Showing posts with label trend spotting. Show all posts

Tuesday, 8 January 2019

TUTORIAL | POCKET LETTERS

Today I would like to show you how easy it is to create a pocket letter with digital products. My process is super easy and fun and it is so rewarding to have a tangible product in the end. Believe me, I used to be 100% digi and never considered hybrid, but when the pocket letter swap (more info here: https://the-lilypad.com/forum/threads/lilypad-letter-swap-info-timeline.56657/ ) started at TLP I gave it a go and I love it.

OK, now, the December letter had the topic "Christmas" and that was a no brainer. I decided to go mostly with Mirjam's new "Down the chimney" products (and added a few bits and pieces from other kits). So, how to go about it with minimal fuss? Here is how:

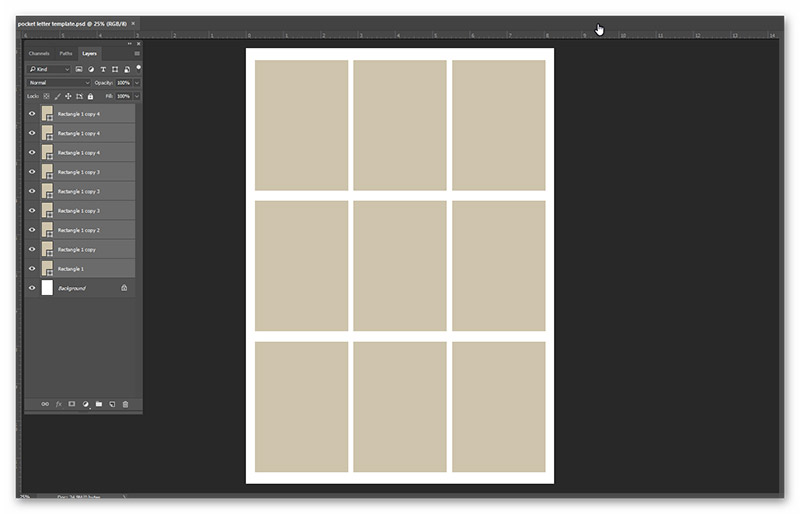
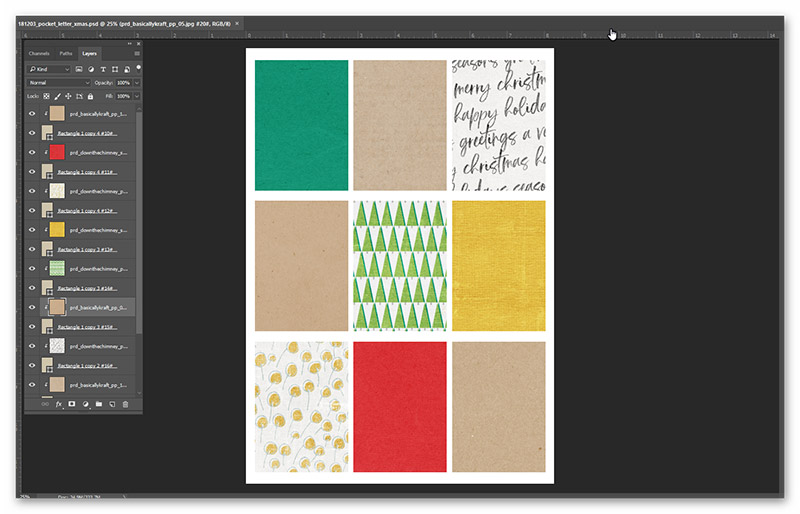
First I opened my pocket letter template with my nine cards all laid out. You can find the link to the template at the bottom of the post.


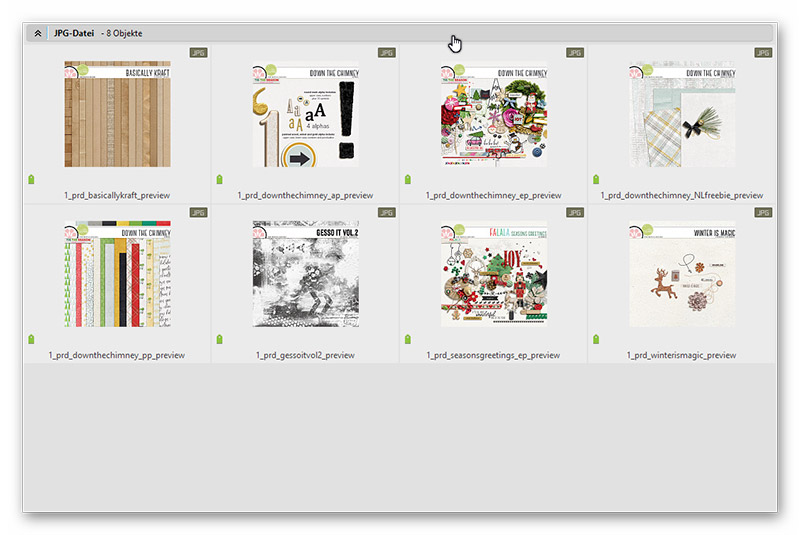
I also gathered a few supplies already in ACDSee and chose three kraft papers from Basically Kraft and six papers from Down the chimney to give each card a different background.


Just clip each paper to a card. I always kind of arrange them already in the way that I like so I can envision what the pocket letter will look like later (this is not carved in stone, however).

So this is my basic letter.


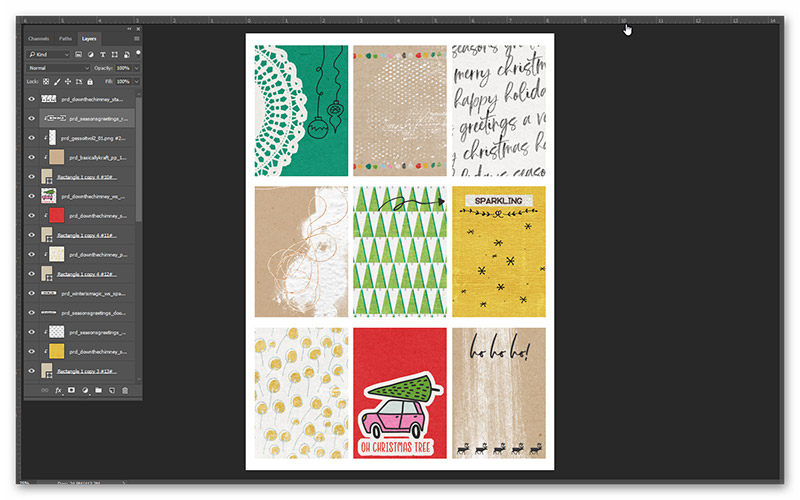
I then added some gesso to make it look a bit more artsy. Mirjam's gesso is awesome and less messy than the real thing. I also added some writing and stickers, as well as some ornaments and paint that are hard or impossible to cut out by hand.


Next I chose random elements that might or might not end up on the finished pocket letter. I normally just collect stuff that I think might look good, pull it into my pocket letter layout and resize it so it fits into a pocket. Sometimes I use larger elements that I print and then cut in half to use on two pockets next to each other (just an idea - I didn't do that with this letter). After resizing I move them to a new A4 page and arrange them there so they can be printed later. Make sure you don't place anything too close to the edge of the sheet as it might get cut off when you print. Some elements that are already on the cards I print again to stick them on top later with dimensional glue dots for a 3-D effect. I sometimes make my own wordstrips with German words or phrases to give my pockets a little international flair.
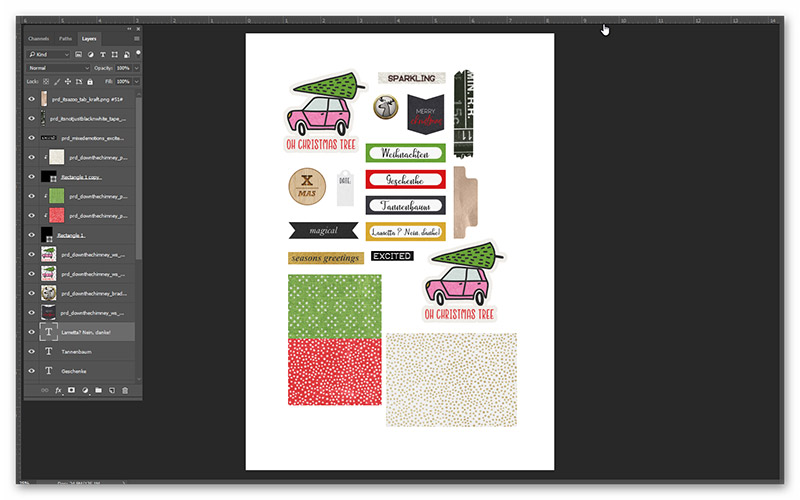


Now that I have prepared everything in Photoshop I print my two pages out on white paper. I am using HP Colour Laer paper in A4 and a weight of 200g/m². Once everything is printed I am cutting out my cards (a paper cutter really, really helps)
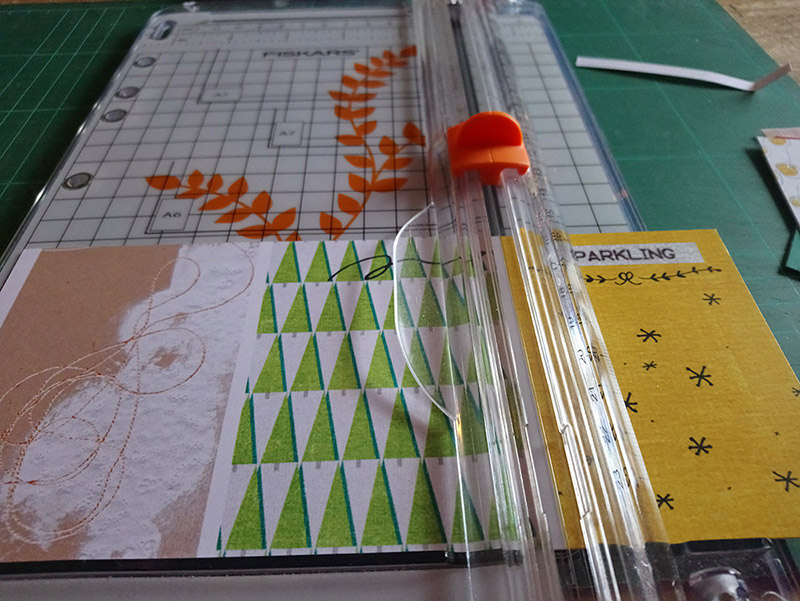


and lay them out.
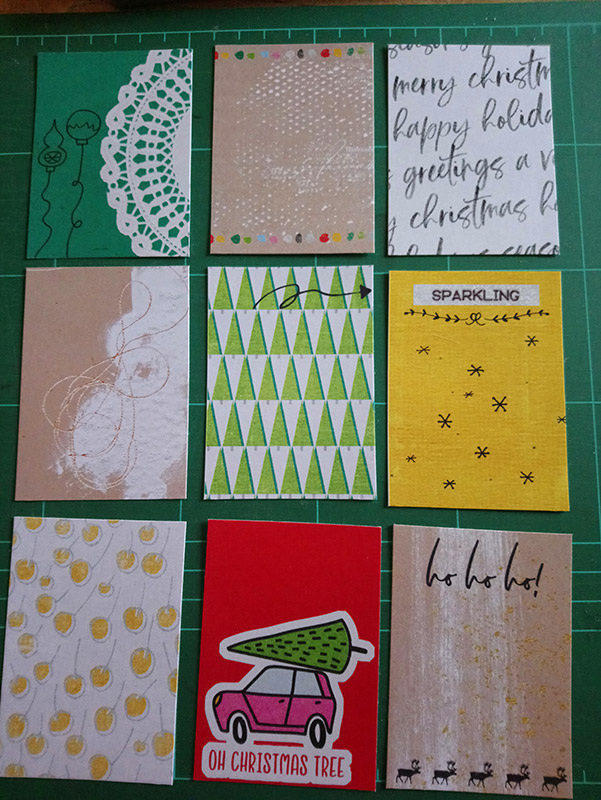


I then cut out all my elements
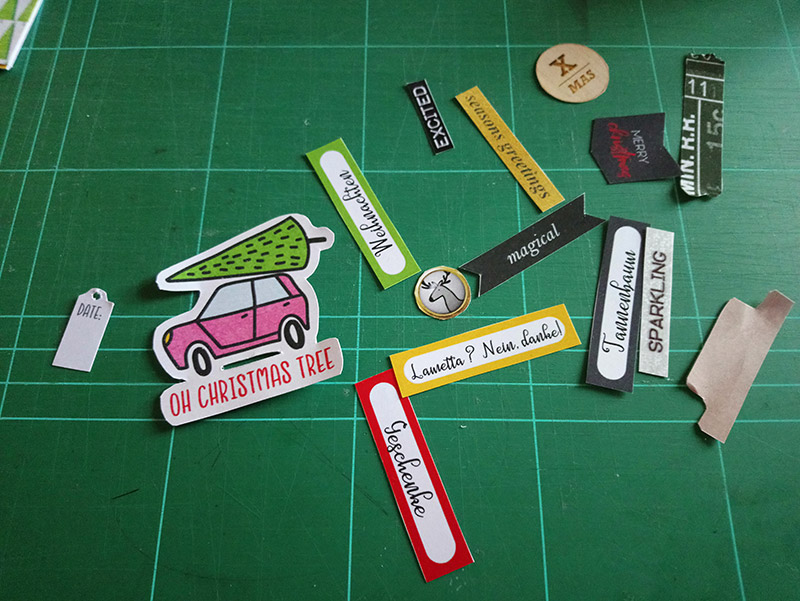


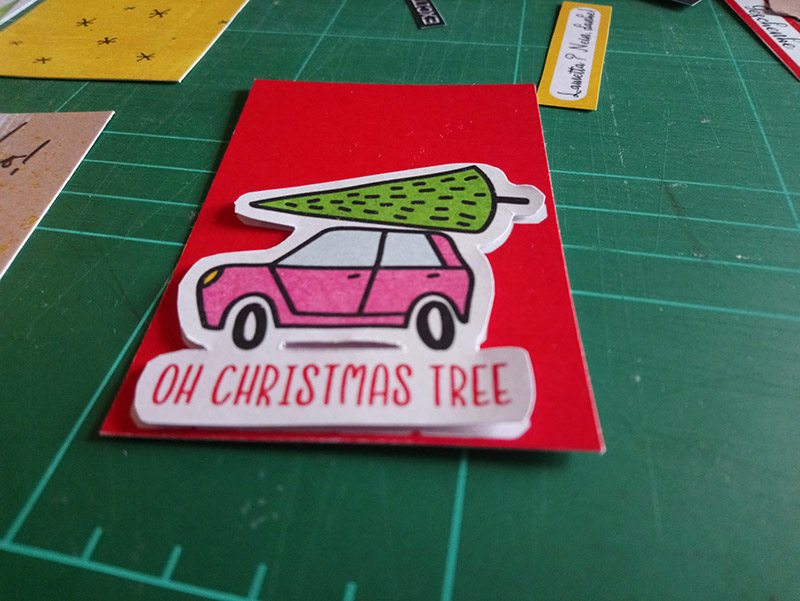
and prepare my individual cards. Those dimensional glue dots are awesome. They give your cards such a great look, even when they are put into the pockets. I LOVE them.


I also sometimes use some fabric (this one I got from Sokee in the November swap and it fit perfectly with my colours here, so I made use of it right away).
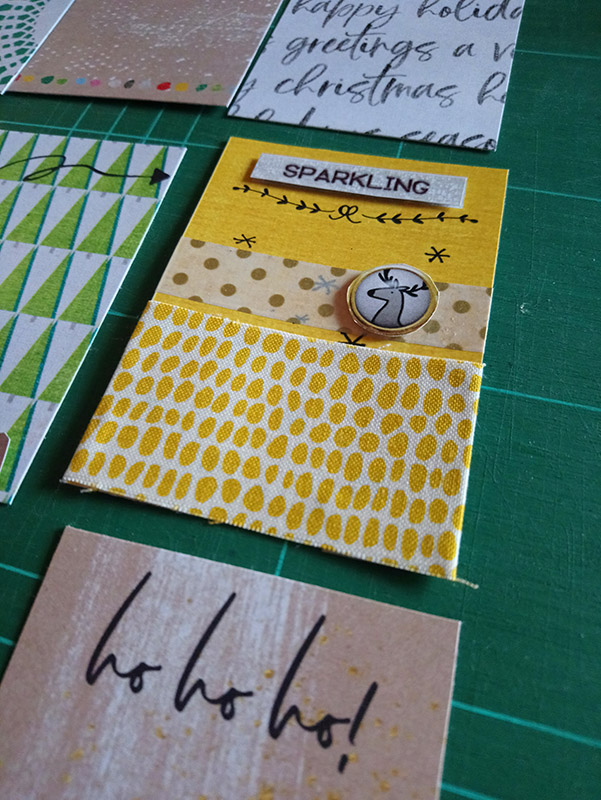


I stamp a little (depending on what stamps I have). Here I just stamped some rectangles that went under the 3D word strips.
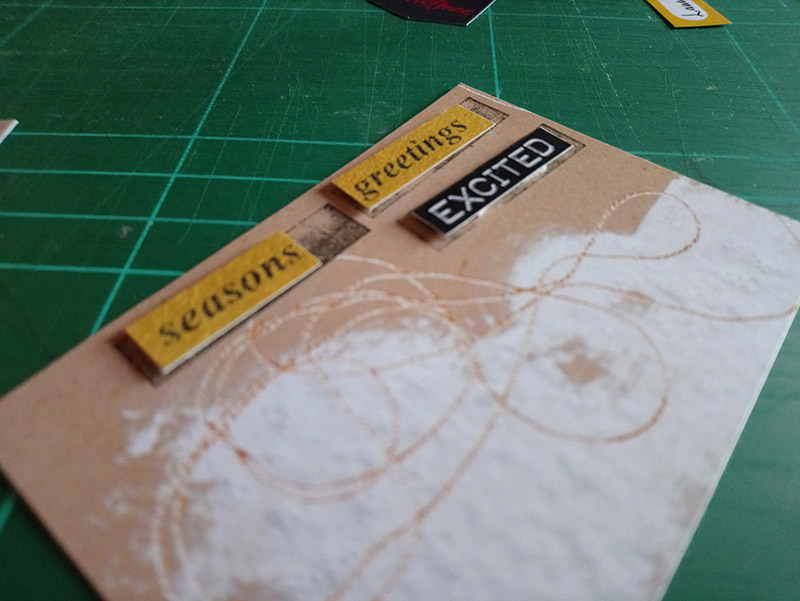


The doily that I already put on the card in Photoshop is being covered with a real doily (I never liked doilies that much, but they are quite nice actually and a pack for a few cents goes a really long way).
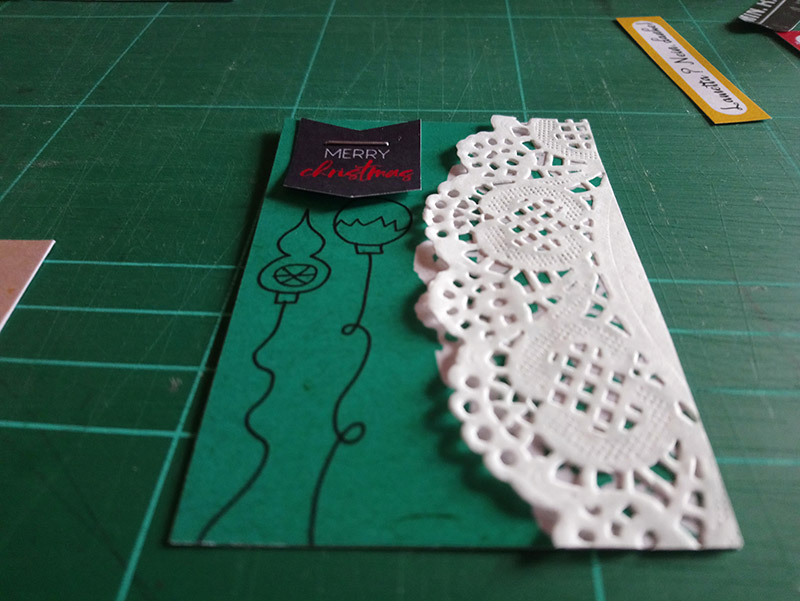


For "real life" supplies (i.e. non digi) I only used some washi tape, some adhesive ribbon, a few wordstrips from a magazine, a little silvery snowflake that I happened to find in my supply box on one of the cards
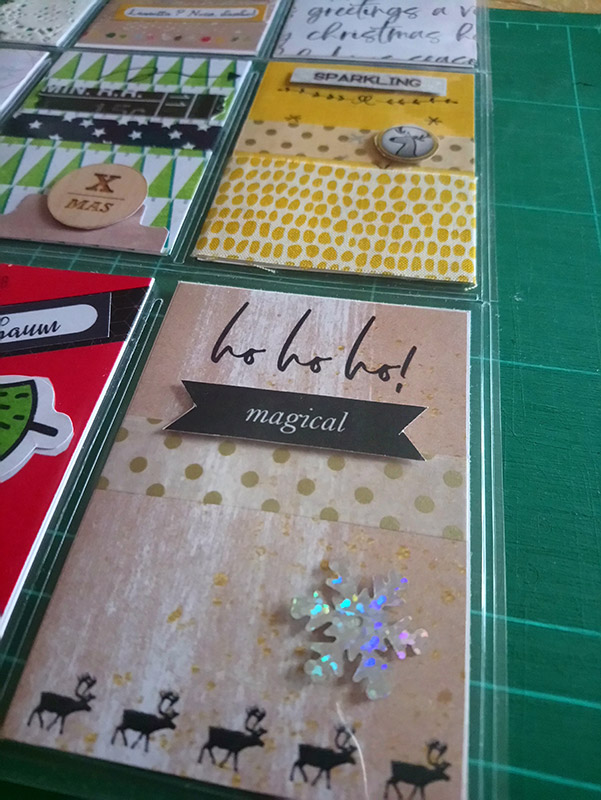


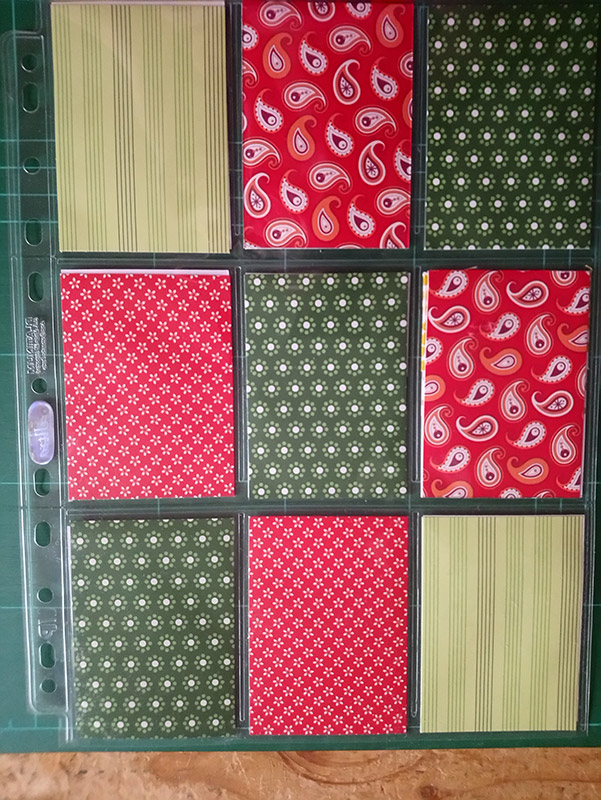
and some cardstock from a pad I already had for the back of the letter.


The punch holes I decorated with some ribbon that I also already had from my sewing days. And there is my finished pocket letter:
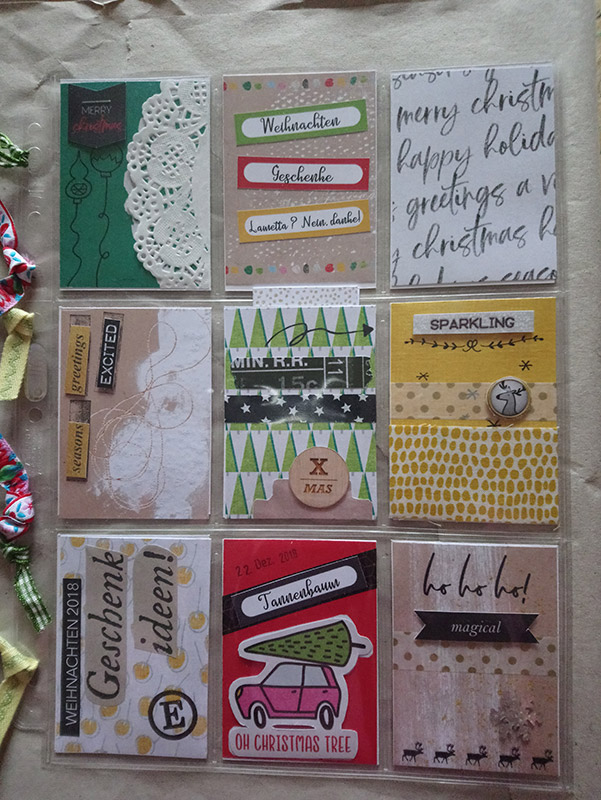


I added a little letter to my swap partner and to ship it folded the PL and tied it together with some string. There are tons of ideas how to wrap your pocket letter, but this time I kept it very basic.
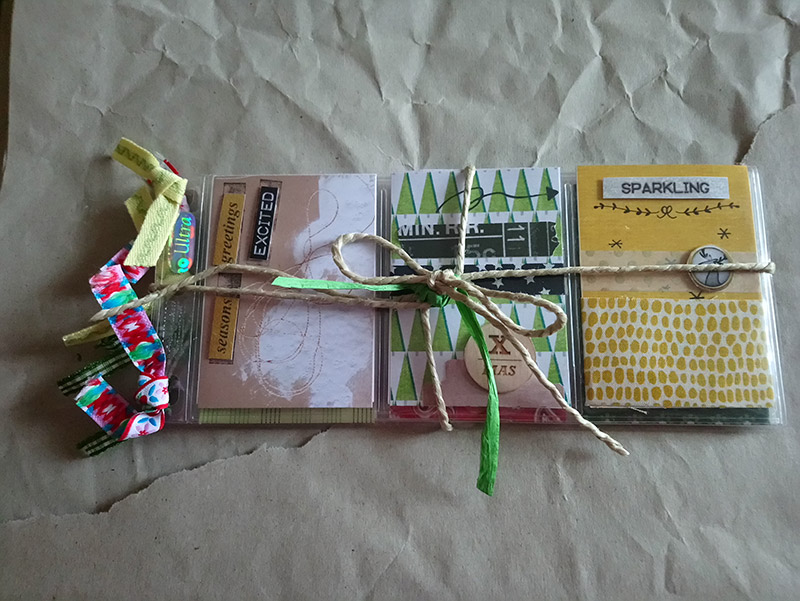


That's it! Easy, right?

Why not download the pocket letter template HERE and give it a try. We would love to have you swapping with us. Again, here is the link to the swap at TLP: https://the-lilypad.com/forum/threads/lilypad-letter-swap-info-timeline.56657/

Credits:
Basically Kraft papers by Pink Reptile Designs; Down the chimney papers by Pink Reptile Designs; Gesso it Vol. 2 by Pink Reptile Designs; Down the chimney elements by Pink Reptile Designs; Winter is Magic freebie by Pink Reptile Designs; Falala Seasons greetings elements by Pink Reptile Designs

Tuesday, 9 June 2015

TRENDSPOTTING | OUT OF THE BOX PHOTOS


Hello Scrapping Friends! This episode of Trendspotting takes a look at the influences design and advertising have on the Digi Scrapbooking community. Raise your hand if you've used an advertisement or great design piece as inspiration for a scrapbooking page? I personally do this all the time. And if you are a regular follower of the blog, you have probably seen our Challenges that use art and design pieces as inspiration for the monthly challenges. It is great fun and can lead to some fabulously creative pages! So, I thought it would be a good idea to look at some of the "out of the box" ways a photo can be incorporated onto our pages using art, design and advertisements as our main influence on our pages. After all, the photos are usually the stars of our pages and thus our way of holding onto those precious memories. Let's make them really shine!

If you've tuned in for past posts on Trendspotting, you know by now that I love to spend time on Pinterest. Pinterest is my "go to" resource for finding and keeping tabs on great pieces of design and art. I even have a board called Inspiration, where I pin things that I may want to go back to, in order to lift the idea (or part of the idea) for a future page. Just look at the amazing and varied images I have pinned for interesting ways these artists have used photos and imagine the possibilities of translating these ideas to your scrapbook pages.


Inspired yet? I know I am. Let's take a closer look at why these images stood out and how they can be applied to a scrapbooking page.

1. I love how the square photo is overlaid with triangles in different colors and opacities. A few spaces are even opaque. This technique really draws the eye to your photo while making the photo a design element as well.
2. This image is really an ad for instagram magnets available in different sizes. I think it would be so cool to copy this stacking of images  in this manner and placing them on a page at an angle. Awesome!
3. The white space, the sketchy image, the font, varied in color and size. Such a neat minimal design.
4. The triangles mixed with text, cascading down the page. The monochromatic, minimal look. It just works.
5. Such an interesting approach to an architectural image. The cut out design and its continuation via the lines. Not for every photo, but with the right one, this could be a really creative page!
6. More triangles and mixed opacities. I liked that this one created a diamond shape in the middle of the piece for text. It would be cool to reverse things with a strong image inside the diamond and pattern paper or simple shapes of varied solid colors on the outside.
7. The image inside the glasses is very cool. Think about doing this with lots of different objects on your pages: a mirror, a window, a door, a book.

If you ever lose your scrapping mojo or are feeling uninspired, this can be a great way to kick start your creativity. Try putting together a collection of "pins" together for yourself, so you always have a source of inspiration waiting for you!

Below, I've picked three additional designs that have interesting techniques for adding photos to your pages. I like the idea of keeping the focus on the photos for this type of page, so I've picked a lot of clean, minimal designs. But if you are more of a full page scrapper, feel free to take the basic idea and fully dress up your page. Go for it!

8. This example, by paper scrapbooker Rockermorsan [found at Studio Calico] , isn't exactly an art piece nor is it an advertisement, but I bet all my cupcakes on the notion that this scrapper was in some way influenced by design. I love the use of triangles (so trendy) and how the photo spans these simple geometric shapes. I employ this technique often, where I use one photo and split it up across multiple frames or masks. But I admit I've never done it quite like this. I love this idea of taking a basic shape and spanning the image across the triangles in this layered manner. And the repetition of the inverse triangles, but with pattern paper, is genius. The processing on the photo really makes it stand out!


9. Up next is this cool image from a Nordstrom catalog. I love how the woman is cut out with the white border. It's a technique I see a lot from digi scrappers, but what makes it stand out even more is the repeat behind it with another highly contrasting photo. It would be cool to do a lot of repeats and add in multiple photos or pattern papers.


10. This amazing image found on thethinkingtank.tumblr.com is so cool. I love the way the frame is used on part of the image and in a different orientation than the original. I love the slightly different tones in the two images with the background image turned into a sketch. If this technique for adding a photo to your page, doesn't demand attention, I don't know what will!


So what do you think? Inspired to try something like this on your next page and make your photos really shine? If so, stay tuned for the next blog challenge on the 15th. If you haven't participated in April's yet, there is still time.

Happy scrapping!

Tuesday, 10 February 2015

TRENDSPOTTING | FRAME ME


I don't know about you, but I love a scrapbook page with a stand out frame. There's something classic and elegant about a good photo with a beautiful frame laid upon it. Your eye immediately knows where to look. But lately, I'm noticing lots of scrappers who have been using frames in really creative ways on their layouts.

Frames have been around forever and ever ... as long as there have been art or photographs to place inside them. But whether in the scrapbooking world or not, frames can be useful in all kinds of applications. There are certainly no shortages of creative uses for frames found on Pinterest. Just look at some of the ways these creative folks have used frames around the home or office.


I've scanned the PRD TLP gallery and found these inspiring pages where scrapbookers have used frames in unique and creative ways. Maybe it will inspire you to think twice about simply just placing that pretty frame over your photo and moving along?

First Up is a page by Mirjam [I have to admit, this page was the inspiration for this Trendspotting episode]. I love it when designers scrap and this page does not disappoint. The photo is framed in so many creative ways on this one page: the grey cut out frame, the JC, even the stitching grid is acting as a frame here. And I love the look of the cut out frame being titled a bit for visual interest!

http://the-lilypad.com/gallery/showphoto.php?photo=177979&title=moc-challenge-7-okay&cat=500
Okay? page credits

Here, Sarah/PLM uses an elegant wooden frame that demands attention. However she doesn't simply place the photo neatly inside this beautiful frame. Instead she places it over her photo and leaves the edges of the photo visible underneath. Clever and adds such a subtle, interesting effect!

http://the-lilypad.com/gallery/showphoto.php?photo=180389&title=take-note&cat=514
Take Note page credits

How about this geometric page by Shannon/Roboliver? I love her photo borders. She uses PRD's super cool Fold'em Frames. These frames come as PSD clipping mask files and make it so easy to create an edgey and fun look on your pages! And the framing around her title echos this cool geometric vibe.

http://the-lilypad.com/gallery/showphoto.php?photo=178939&title=that-face&cat=500
That Face page credits

And how adorable is this dreamy page by Geraldine, which has the photo coming right out of the frame? A pocket frame is also used as a matte under the photo, adding some nice layering to the page!

http://the-lilypad.com/gallery/showphoto.php?photo=178208&title=little-angel&cat=500
Little Angel page credits

And Em/Justagirl uses a filmstrip with a series of photos for her page, but she takes it a step further and blended a photo into the background while also adding a frame over top the filmstrip to draw the eye in! So effective! Love this idea!

http://the-lilypad.com/gallery/showphoto.php?photo=177790&title=make-sure&cat=844
Make Sure page credits

Christa uses a fun circle cut out in her background paper to showcase her photo! She also does not stop there, but adds an overlay to really draw the eye in. It is such a clever way to make a clean page shine and a really unique use for photo overlays!

http://the-lilypad.com/gallery/showphoto.php?photo=176865&title=friday-jan-moc4-clean-2fsimple&cat=844
Friday page credits

One more from Anja using the Torn Treasures Vol. 2 frames by PRD. The torn frame and classic B&W photo are a perfect pair here. A simple kraft background as the foundation helps this image take center stage.

http://the-lilypad.com/gallery/showphoto.php?photo=181222&title=be&cat=844
                Be page credits

Did you know that the Pink Reptile Designs store has a category specifically for frames?  You can find them all here: Pink Reptile Designs Frames. And here is a peek at what is in that category:

http://the-lilypad.com/store/Pink-Reptile-Designs/?catid=23

So what do you think? Inspired by these amazing pages and versatile PRD products to try to mix up the way you frame your photos on your pages? I hope so! And hint,hint ... come back on the 15th for the next challenge. I think there might just be a bit of "creative framing" in your future! 

Either way I am excited to give you this coupon for a 25% discount on ANY of those pink reptile frames!
http://the-lilypad.com/store/Pink-Reptile-Designs/?catid=23


Happy Scrappin´!

Tuesday, 16 September 2014

TRENDSPOTTING | CROCHET

Welcome to the latest edition of Trendspotting. While trying to select which trend to spotlight for this month, I thought, how could we possibly have a regular series about scrapbooking trends on the Pink Reptile Blog and not talk about crochet?

It is definitely one of Mirjam’s trademarks … she incorporates all kinds of beautiful crochet bits and pieces in her kits and often creates element packs based on crochet pieces alone.  Not only does Mirjam crochet for her digi scrap kits, she is an avid crocheter and creates the most adorable things. Speaking of adorable things, have you met Geoffrey? If not, you must meet him here. There is a whole category for crochet on the blog. And let me tell you, Mirjam is not alone in loving the art of crochet.

I spent a little time scanning galleries, blogs, and Pinterest in search of all things crochet and paper crafting and I promise you the trail of inspiration and creativity was never ending.  I found out that scrapbooking icon, Ali Edwards, uses crochet embellishments on her pages, as do many, many others.  Card makers use crochet bits quite a lot for embellishing their crafts too. Handmade artists are not only making crochet embellishments of all kinds for scrapbooking, but they are combining paper and crochet together with word art … can I just say … LOVE that! You can even find crochet tutorials, for free or purchase, geared towards scrapbookers and paper crafters!

Here is a small sample of the crochet pretties that caught my eye while on the hunt for crochet in the scrapbooking industry.


I have to admit, I tried to teach myself how to crochet last summer and it didn’t go very well.  I purchased quite a few books with instructions on how to make the cutest flowers and things. What was I thinking? I probably should have waited until I could at least crochet a square before making those purchases! Lucky for all of us, we can simply put down the hook & yarn, and pick out a fun kit by Pink Reptile Designs and easily get that irresistible, homespun crochet look on our pages in a snap!

Here are some of the ways the Pink Ladies use Mirjam’s crochet pieces on their pages:


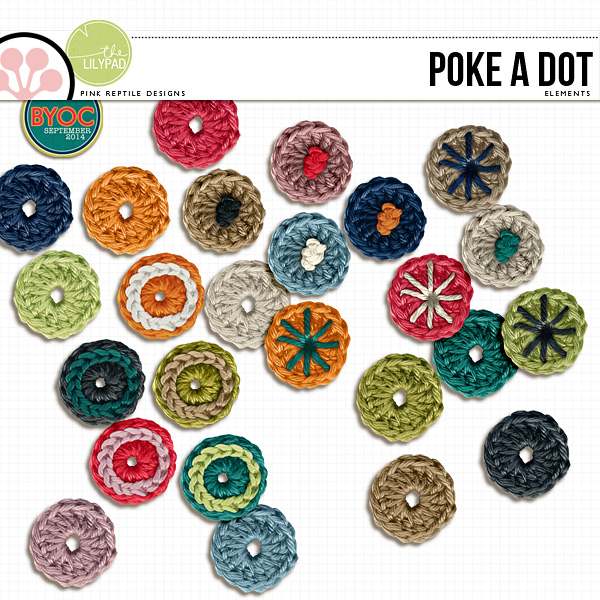
Anja uses the latest Poke A Dot elements for her gorgeous page, adding buttons to the centers and strings around them to give her page a happy, family feel. I love the way she lets them fall off the edge a bit.


Helen also uses the Poke A Dot elements front and center for her sweet page about snuggles after work! I get such a warm, homespun feeling looking at this page!


Cynthia uses the most adorable crochet scrapbooking embellishments I think I have ever laid eyes on for her page ... aren't the telephone and doll legs with shoes darling? These are from Chatterbox. There are lots of pretty flowers in the kit too! 


Ellen uses the Silly Collab, featuring the famous Geoffrey the giraffe, along with lots of lovely crochet leaves to give her clusters of flowers dimension and texture.

If you are wondering how you can find all these lovely crochet pieces, do you know you can do an advanced search for multiple items while browsing The Lilypad store? For Search for Pattern, simply type in crochet and under Designer, select Pink Reptile Designs ... and you will see all the PRD products with crochet items.

So cool! And here is a closer look at the latest crochet element pack, Poke a Dot, from Pink Reptile Designs. Newly released and it matches the entire September BYOC at The Lilypad. Gorgeous!

http://the-lilypad.com/store/Poke-A-Dot-Elements.html

So ... let us know! Do you love to use crochet pieces on your pages? If so what are your faves?

Tuesday, 12 August 2014

TRENDSPOTTING | CIRCLES


I’ve been perusing the galleries all over digiland and one thing that is really calling me lately is Circles. I’m seeing them everywhere.

For fun I went hunting for inspiring art featuring circles on Pinterest and to be sure, there is no shortage of circle art. Artists are using circles in every way possible: with chalk, paint, ink, paper and in doodled sketches.

A collection of just about anything will draw the eye in, but a collection of circles, when paired up on a page full of linear objects like frames, photographs and paper blocks, really stands out. There’s just something about a curve, that calls your eye and says “look over here”, when sharing space with a bunch of rectangles!
Like how Donna used circles, instead of rectangular paper pieces as mattes to ground her photos and title against the contrasting wide stripe background. This helps guide the eye to the center of her page where her gorgeous photo is located. The trio of circles leads the eye from the photos to the title and through all the various details she has brilliantly included on her page. The "notebook paper" border is another subtle addition of circles on her page. Love this!

http://www.the-lilypad.com/gallery/showphoto.php?photo=147003&title=grad-pic&cat=844

This page by Cynthia, is so well executed. I love the varying ways Cynthia has used circles on her page. Her circles, along with that fabulous title (must scraplift!), really nail down the central focused, linear composition on the page. I love the varied sizes of circles, with one over-sized and striped, one being a clock and another having an outer ring. Such an amazing page!

http://www.the-lilypad.com/gallery/showphoto.php?photo=147225&title=all-grown-up&cat=844

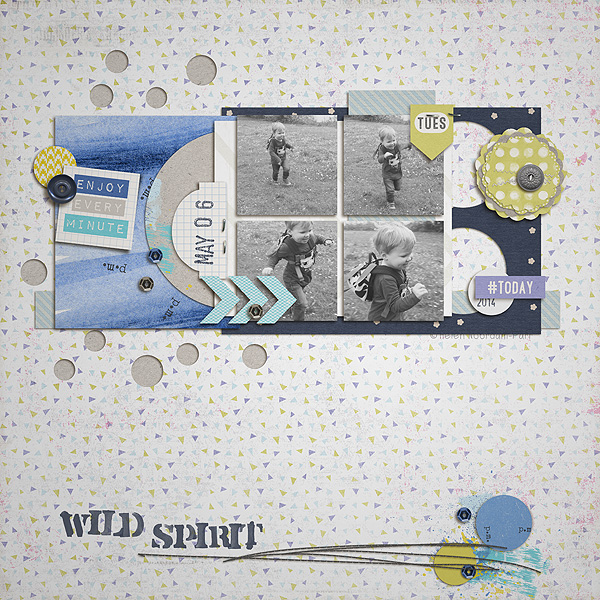
Another widely popular way to use circles is to have them as cut outs on your pages. I love this digital technique and the texture it can add through having various layers on your pages. Here’s a fabulous example by Helen. She creatively uses both cut out circles and layers of paper circles on this gorgeous page. I also love all the cool tones of her color palette with the soft black and white photos. Lovely!

http://www.the-lilypad.com/gallery/showphoto.php?photo=145317&title=enjoy-wild-spirit&cat=579

Circles are showing up not only as paper pieces, but as stitched, painted and doodled circles as well.
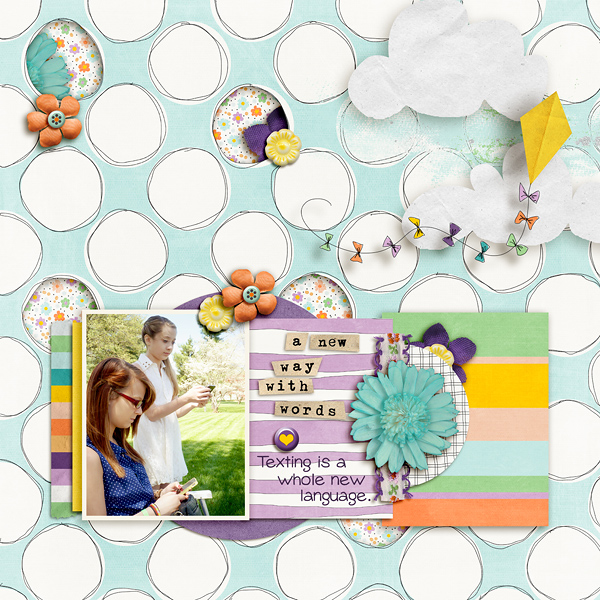
This page by Ellen uses Mirjam’s "Drawn to You paper" of doodled circles in such a playful way. I am in awe of her creativity here! I love that she chose to cut out some of the circles and layer a tiny floral patterned paper from the same paper pack underneath. So awesome!

http://www.the-lilypad.com/gallery/showphoto.php?photo=148803&title=a-new-way-with-words&cat=844

Circles can also add interest to a scrapbook layout in subtle ways.  Here Audrey masterfully adds circles to her page through the use of elements. I love the way she uses Mirjam's crochet Yo-Yos scattered around the page as the centers of the doodled flourishes.  Truly a creative design element that I adore!

http://www.the-lilypad.com/gallery/showphoto.php?photo=147641&title=checkmate&cat=844
 
That’s it for this edition of Trend Spotting.
What about you? Do you like to use circles on your pages? Have any unique and creative ideas for adding circles on your scrapbooking layouts? We’d love to hear about how you use them!

Tuesday, 13 May 2014

TREND SPOTTING | HAND LETTERING


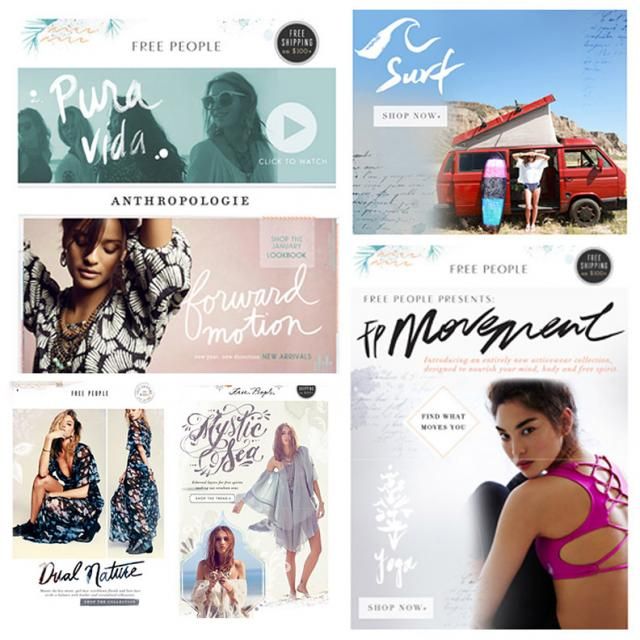
Big Bold Handwritten Word Art is everywhere, not only in scrapbooking, but in fashion and advertising as well.

Take a look at these ads from Free People and Anthropologie. The handwritten lettering can be soft and subtle or fancy and highly textured. Regardless ... when used by the designer, it always seems to be a bold feature on the advertisement.

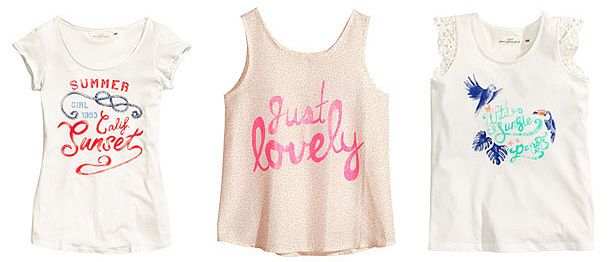
The same is true for handwritten lettering found in fashion, as seen on the shirts from H&M below ... the word art is prominent and really makes a statement, even on the shirts where other graphics are present.

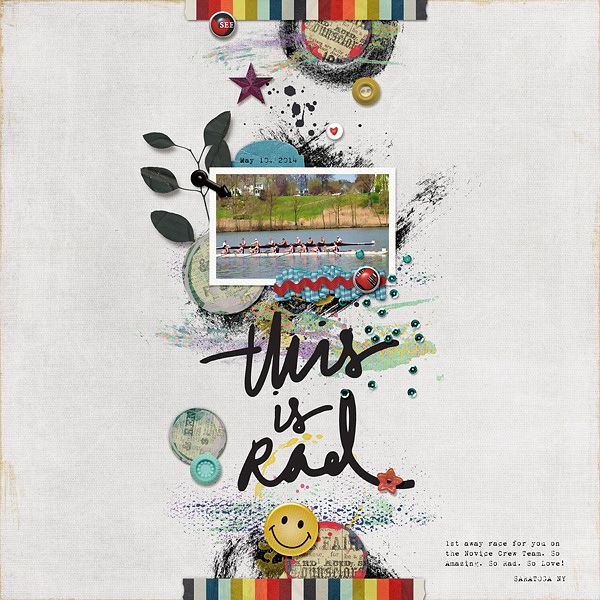
Scrapbooking has also embraced this Big Bold Handwritten Word Art Trend. You’d be hard pressed to visit a scrapbook gallery these days and not find bold hand lettering on many of the layouts, journal cards and projects.

I happen to love this trend and wanted to share with you some of my favorite Pink Reptile Design kits featuring handwritten word art.

First up is Spring Talk Word Art Pack which contains 20 Spring related word art in plain and sticker versions, that can be used as titles or as fun embellishments to give your pages that bold hand lettering touch.

http://the-lilypad.com/store/Spring-Talk.html

Here are some truly amazing pages from the Pink Ladies featuring Spring Talk & the Big Bold Handwritten Word Art Trend:

by Natascha
by Céline
by Ellen

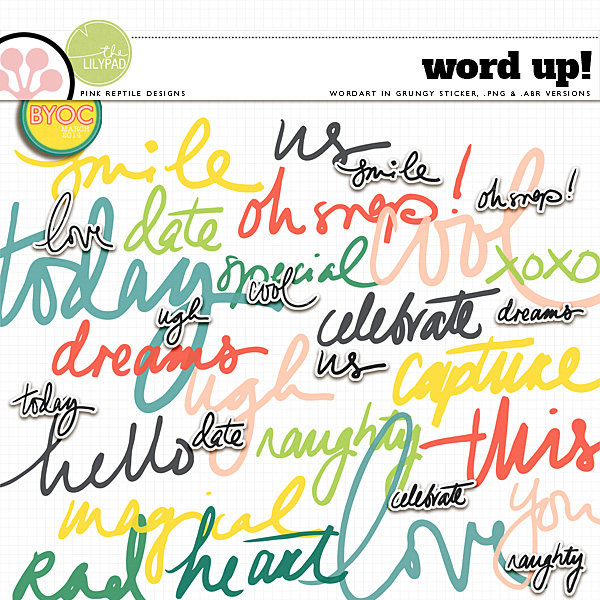
Next, is the Word Up Kit featuring 20 versatile hand written words in stamp, sticker and brush format. These are everyday words that will accent just about any page, no matter the theme or content.

http://the-lilypad.com/store/Word-Up.html


Look at these drool worthy pages featuring Word Up & the Big Bold Handwritten Word Art Trend:

by Iva
by Marnel
by Jenn McCabe

Chalkies | My Lucky Stars is a great kit with script hand lettering done with the popular chalk look. These word art elements look fabulous as a bold title or even as a subtitle on layouts!

http://the-lilypad.com/store/Chalkies-My-Lucky-Stars.html

Here are some examples from the Pink Ladies showcasing Chalkies in bold ways on their pages.

by Cynthia
by Akizo
by Carrie

Mirjam also has a fun set of mobile ready elements called The IttyBitties if you prefer to add fun handlettering to your social media photos. These are available as True Type Fonts or as PNGs, so they'll easily work as elements on your scrapbook pages too.

http://the-lilypad.com/store/Ittybitties.html

Here are some adorable ways the Pink Ladies jazzed up their photos with this kit.

by Helen
by Céline
by Fe

If you browse through Mirjam's store at The Lilypad, you will see she adds handwritten lettering to many of her kits.  These are just a few examples of kits that have fun handwritten lettering just waiting to grace your next page or project in a bold way!

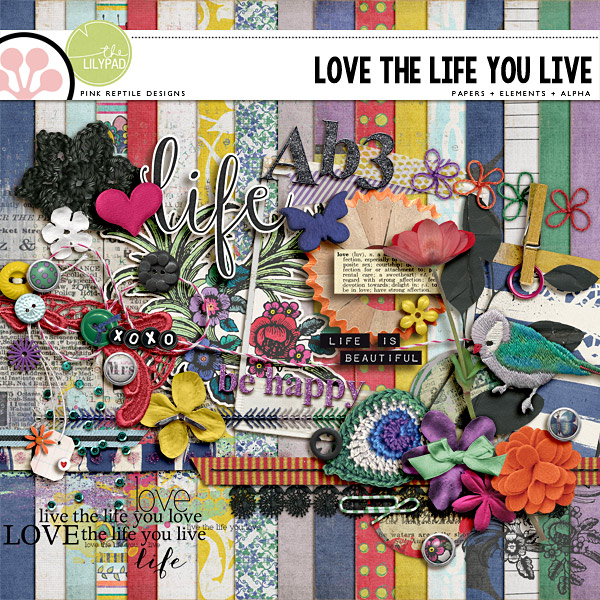
http://the-lilypad.com/store/Love-The-Life-You-Live.html
http://the-lilypad.com/store/I-am-Not-Perfect-Elements.html
http://the-lilypad.com/store/Owl-My-Love.html
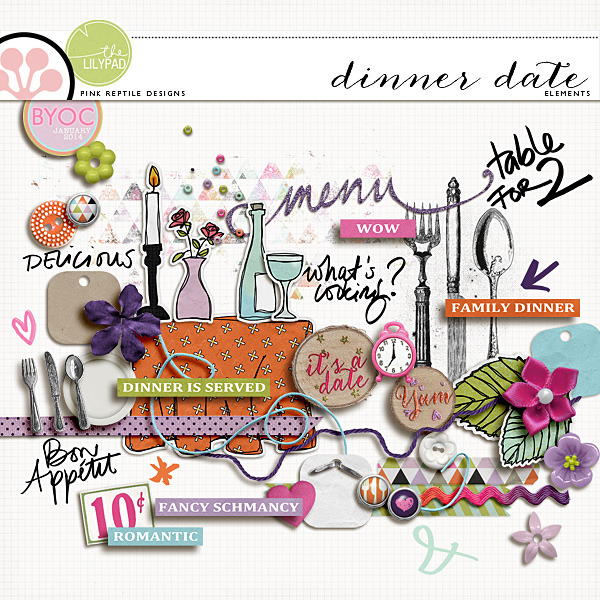
http://the-lilypad.com/store/Dinner-Date-Elements.html
Dinner Date Elements

We’d love to see your pages with Pink Reptile Designs' handwritten word art, so please feel free to share your work in the TLP Pink Reptile Designs Gallery and link us up to your creations! Happy "Big Bold Handwritten Word Art" Scrapping!