
Over the past several months, I've shown tips about using the Affinity Photo program to scrapbook digitally. While we digiscrappers always look for ways to use new programs for our hobby, it bears demonstrating that Affinity Photo can also be used as a photo editor, what it was really created to do. One of the simplest and most common edits we want to make to our photos is to convert them to black and white. We've gotten used to accomplishing those tasks easily with presets for Lightroom or specific adjustments in PS or PSE. The process is also super easy in AP. And like in other editors, there are several tried and true methods to get the job done.


The obvious first step is heading into the Adjustments Studio. Clicking there brings up ALL the adjustment choices to scroll through. You can also hit the arrows near the top and get access to groups of adjustments for specific purposes, like Black & White and Exposure.
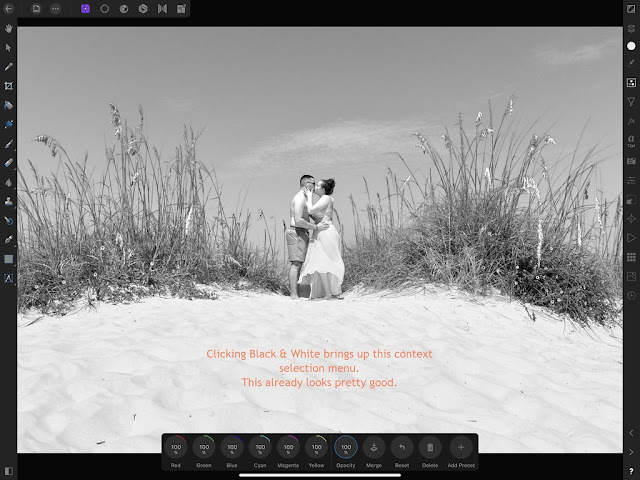


When I click Black & White under Adjustments, it comes out pretty well. All of those sliders in the context menu can be tweaked individually to fine tune my results. If I adjust the opacity, I can get a sort of pastel desaturated version of my photo. If I tweak the color sliders I can achieve almost a sepia tone.

If you want to save an edit to recreate it later, just add it as a preset.

Adding an HSL (hue saturation luminance) adjustment is another way of making a photo black & white.


At the core, a black & white photo is desaturated so I can take the saturation all the way to -100%. But I can also adjust the other two sliders to customize to my preference.

A gradient, most specifically a black to white gradient, is another great method for black & white conversion.

The default gradient is really bright! I'll need to adjust the three gradient points to black, gray and white.


Changing the gradient points is fairly intuitive. I click each of the gradient circle points, make sure it's reflected in the color circle and then select the color that I want for each from the color wheel. For a straight black & white conversion I can also delete the midpoint keeping only the two end gradient points.


One last option for black & white conversion is to Recolor. Like before, changing all the options to zero will desaturate the photo. Then coming back and tweaking them individually will let you tighten up the edit.
Once you've added one of the above adjustments you can always duplicate the layer and change the opacity and/or the blend mode to deepen or lessen the effect. You could also add a brightness/contrast adjustment or an exposure adjustment to deepen the darker colors if you wanted.
I hope I've given you a little taste of the editing engine inside Affinity Photo. We'll dive a little deeper later.
_________________
Stacia
No comments:
Post a Comment
Note: only a member of this blog may post a comment.