
Hello and welcome to another edition of our Three Way series where we show you creative ways to use and stretch your stash. Today's edition, Three Way | In a Bubble, is inspired by two Month of Challenge pages by Pink Lady CT member Barbara aka Sokee. I loved how she used speech bubbles in sweet and creative ways. Take a look:
Here, all of Barbara’s journaling is done on the vellum speech bubble and it forces you to notice the quote at first glance.
This page with the photo taking the shape of a speech bubble is unique and definitely a creative take on how to place photos on our page. Love it!
The photo and the vellum speech bubbles are so fun, they instantly demand attention and make a big impact on the pages! So let’s go ahead and play with some speech bubbles shall we?
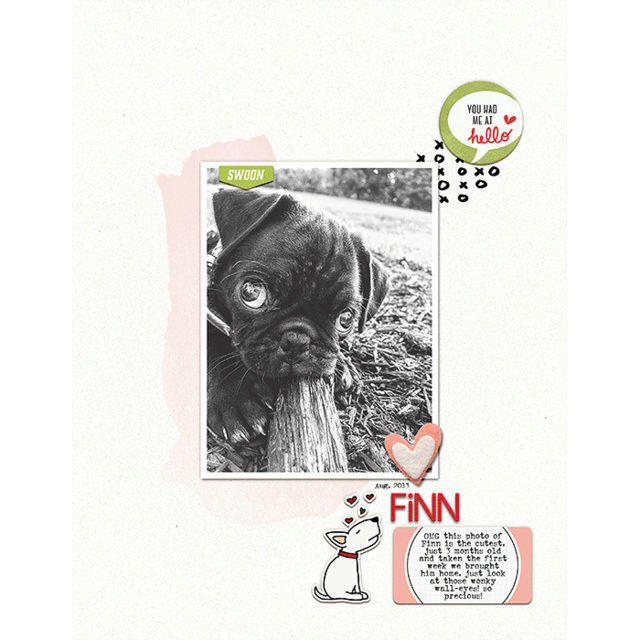
1. First let’s find ways to stretch our speech bubble stash. Sometimes you might have a speech bubble that is super cute but maybe you don’t have a use for the quote that is inside it. So let’s customize it to fit our page. You could take just layer some word art strips to cover up the words or you can make a selection and fill in words there with the background color by sampling it with the eyedropper tool. You could use the clone tool or even spot remover with content aware. Create a new shape on a layer above your speech bubble layer to “cover” the words. Merge the two if you like. Then simply type what ever you want your speech bubble to “say”. For my page: I grabbed this cute speech bubble from the Scrap Fever kit and sampled the white color of the speech bubble. I then used my paint brush tool to paint over the words that were there but kept the cute heart. I grabbed a word art piece from the Puppy Love kit and cut it up to fit inside the speech bubble.
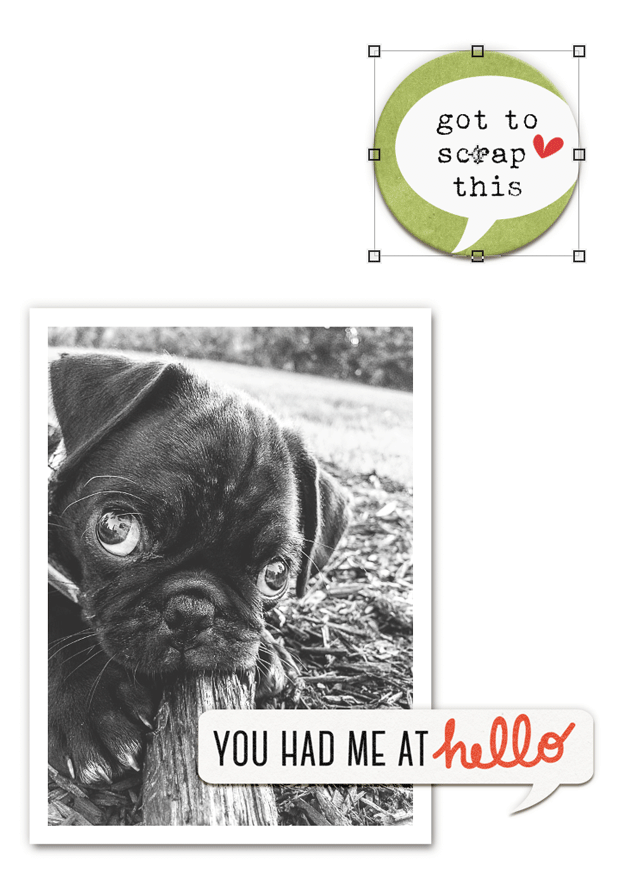
And now I have a custom speech bubble for my page!
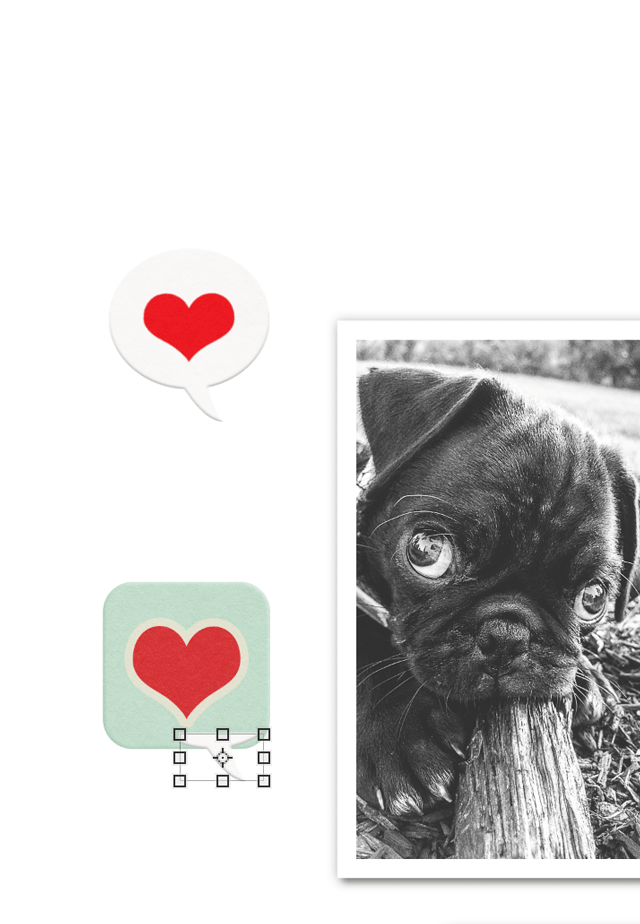
2. Another idea is to make your own speech bubbles. Look through your stash for shapes that would make good speech bubbles. Squares, rectangles (especially ones with curves and rounded corners), even clouds or other roundish objects. Sometimes Journal Cards have cute things you can cut out and use for speech bubbles as well. When you find something that you want to use, you can add a little tail by drawing one with the pen tool or by using an existing speech bubble tail. That is what I did for this little heart embellishment from the Scrap Fever kit. I grabbed a speech bubble from the Puppy Love kit and just drew a rectangle marquee around the tail and made a copy of it. I placed it under the heart embellishment and merged the two layers together. Then I used the clone tool to sample the color with texture of the heart element to transfer to the tail part until it looked seamless.
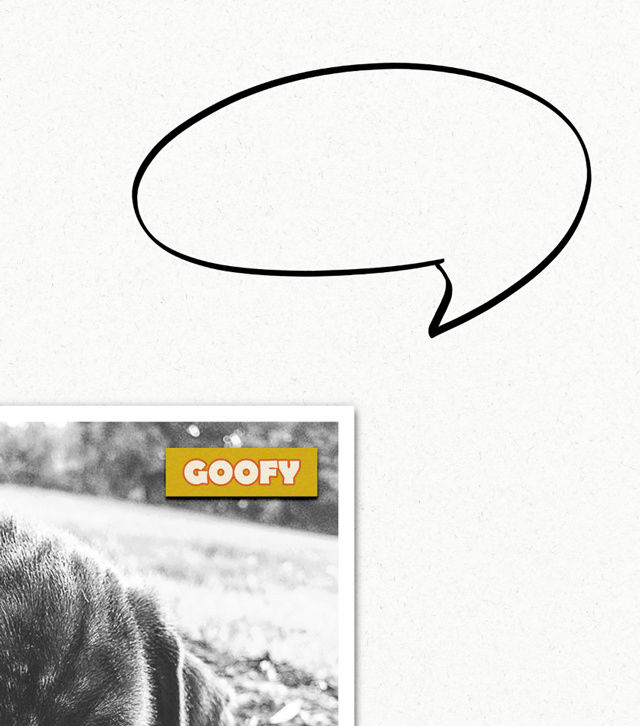
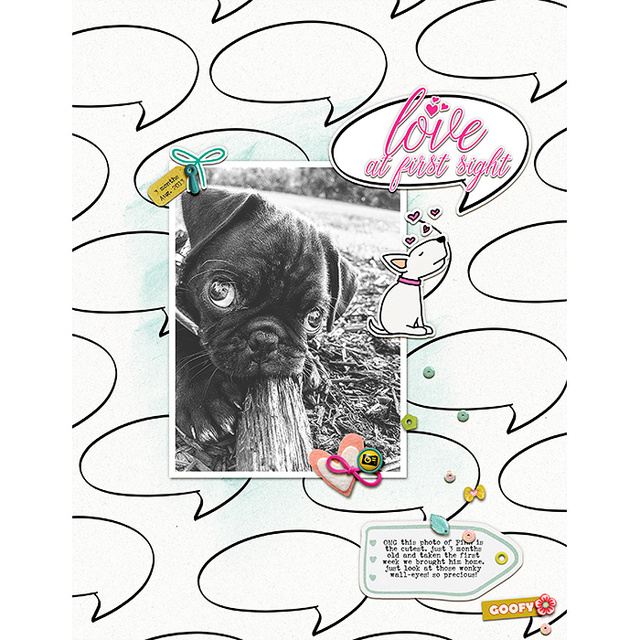
I love having groups of three on my pages so I found two other elements in my stash: the Goofy word art strip from the Me, My Selfie and I Wordarts kit and the Love word art piece is from the Puppy Love kit. I just added tails to those elements as well. Here's how my page looks with a trio of custom made speech bubbles around my photo.
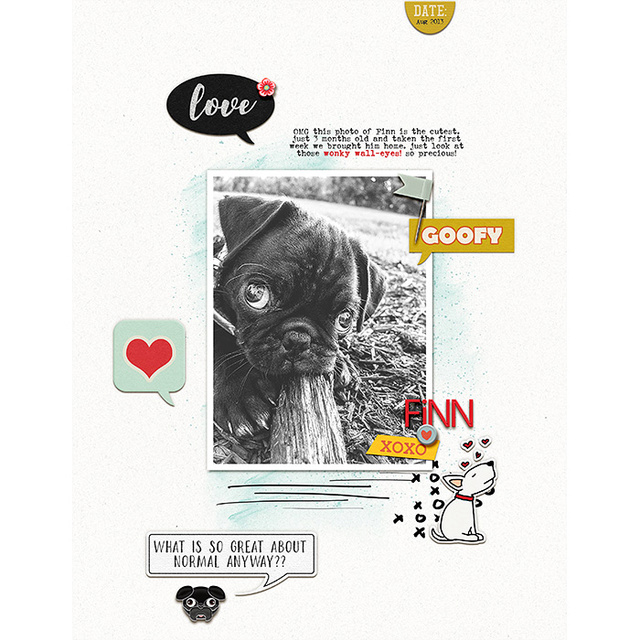
3. The last idea for using speech bubbles is to use one in an unexpected or creative way. Barbara accomplished this by using the speech bubble for the shape of her photo. For those that have been following this series for awhile now, probably know one of things I love to do is use these ideas as a design element on my page. By repeating the speech bubble over and over again you can create a custom background and a really fun whimsical look for your page. I grabbed the doodle speech bubble from the Me, My Selfie and I kit and extracted the black doodled line. I then repeated it on my background to make a custom background.
And here is how my page turned out with the speech bubble as my background.
Mirjam has endless options for playing with speech bubbles on our pages. Take a look at the kits in your Pink Reptile Designs stash and show us what you can do with speech bubbles. We'd love to see your pages!
I love that speech bubble background!
ReplyDelete:)
DeleteThanks Monica! <3
DeleteGreat tutorial and write up Jenn! I used this with the blog challenge template.. thank you!! http://the-lilypad.com/forum/galleries/coffee-coffee.295076/full
ReplyDeleteChrista