
Hello and welcome to the February edition of our Three Way Series -where we show you creative ways to stretch and use your stash. Today’s post is one that I’ve been planning on doing for over a year now and finally got around to getting all the ideas worked out. You see, I’m in a bit of transition period in my scrapping. I have teens in high school who are not as thrilled to be the subject of so many scrap pages these days. I’m finding myself looking inward more often when it comes to what to scrap about next. But I’m still really bad at scrapping selfies and photos of me. So I think this challenge might be a fun way to get more of “me” or rather “you” on the page - if you choose. Of course this idea can apply to any page you’d like to scrap but it’s really fun and works well with all those little things like “Faves” and “Currently” that we want to document.
Today’s Three Way is Easy as Pie! We are grabbing inspiration from pie charts to help us document and design our pages. Here’s a little peek at some of the things that have grabbed my attention over the last year or so:

Cute stuff right?
Like I mentioned, pie charts are a great way to document your “Faves” or the things that you (or your loved ones/pets/etc) are “Currently” into at this very moment in time. This is a great way to tell a story with out needing photos. You can have fun and assign the different pie pieces a % or just let the size of the piece of pie dictate how much you like that specific thing or how much time you spend on that item. It’s so fun to document a daily routine this way.
Uses for Pie Charts:
Faves: food, movies, music, books, TV shows,
Currently: hobbies you are loving/how you spend your free time/your diet or fitness routine & goals/guilty pleasures
Document: a routine such as your week, a day, your time at work
Or how cute would it be to do a page with 6 little pie charts showing your newborn’s first 6 months of life and how he/she spent her days as she got older vs that very first month of life?
There are so so many ideas for this type of scrapbooking. So let’s switch gears and take a look at ways to actually make a pie chart for this idea.
1. The first idea to use Pie Charts on our pages is to simply use some form of a pie chart as a clipping mask. You can clip paints or transfers, patterned paper or even photos into your pie chart pieces. Take a peek at Pinterest for some inspiration on different styles of pie charts. Then use PS to create your own. Or if you dare - use your tablet to doodle your own handmade pie chart! How fun would that be?
To make one in Photoshop, just start with a basic filled in circle on its own layer. Using your polygon lasso tool cut it into pieces to represent the different things or blocks of time for your pie chart. It doesn’t have to be perfect - just have fun with it.
Here’s the open style pie chart I want to create for my page.

I start with three layers : My Background, a large circle filled with pink (any color works!) and then a smaller circle filled with white. See below:
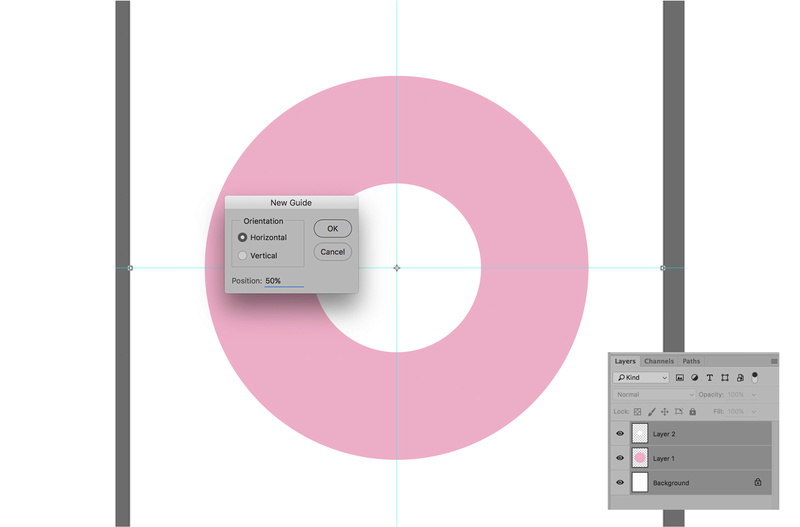
I select all the pixels for the small white circle by clicking on the layer’s thumbnail + CMD (mac) or Control (PC). This puts those “marching ants” around the small circle and I know those pixels are selected. Then I click on the layer for the large pink circle and hit delete. This cuts a whole in the large circle. I can now hide or delete the 3rd layer (the small circle in white).
Add some guide lines on your page so you can easily see your center.
HINT: A quick tip is to type 50% and select Horizontal guide and then type 50% and select Vertical guide and you will have the center of the page marked. Align your big circle to the center of the page with the Align Tools.
If you use the rectangle marquee tool you can cut a perfect 1/4 chunk out of your pie chart by lining up your rectangle with those guide lines. CMD + X (or Control + X) will cut that chunk out and then CMD + V (or Control + V) will paste it on a new layer of its own.
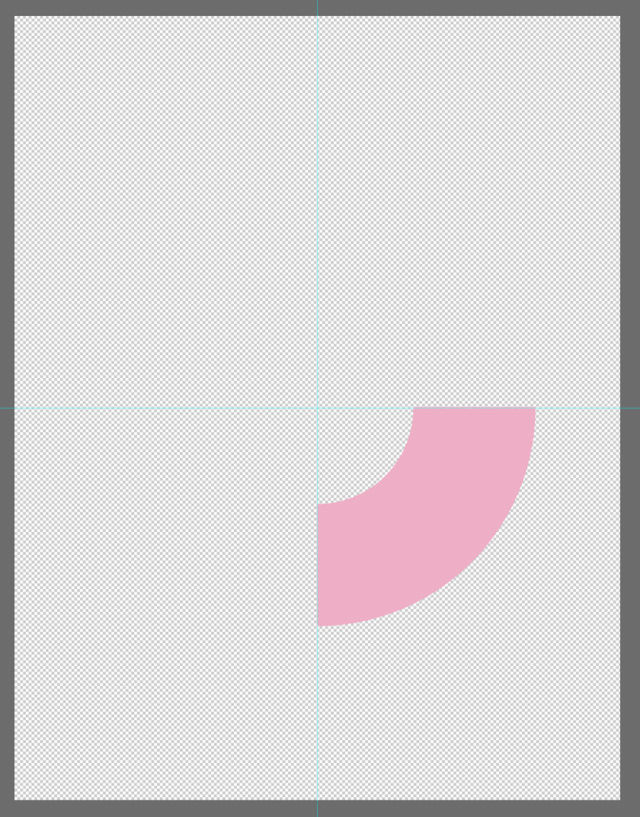
Also use the polygon lasso tool for cutting custom shapes just like you see in this photo.
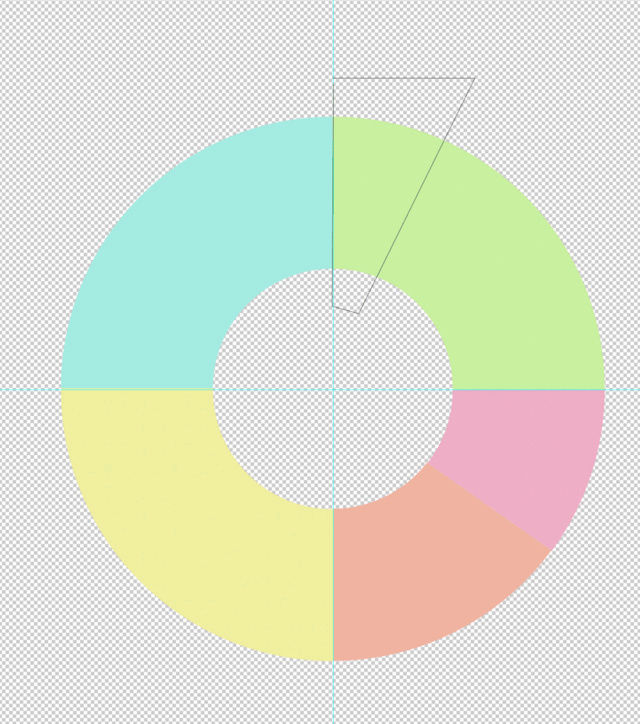
I’ve recolored the different pieces of my pie chart and each one is on its own layer. Now the fun part of clipping paint or papers or photos can be done so you can add your pie chart to your page!
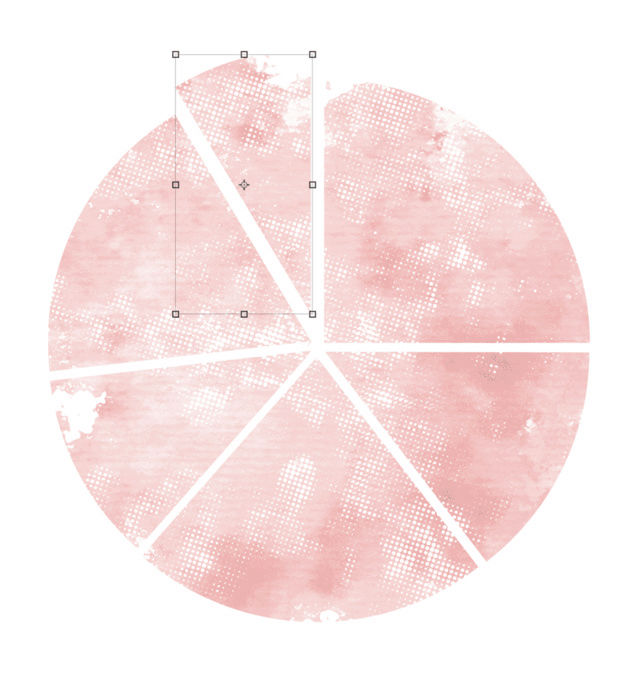
Here’s an example of a more standard pie chart with out that cut out circle in the middle. This one has a pretty soft watercolor brush from Daily Routine clipped to each piece. It would look so pretty in different colors!
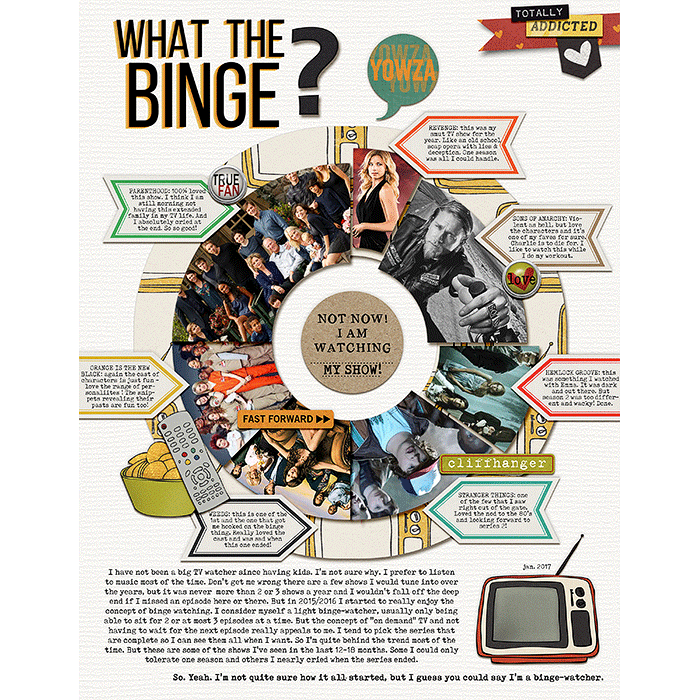
For my page I took images from some of the TV shows I’ve been binge watching. I was never really a huge TV watcher before so I wanted to document this change in me! Here’s how my page turned out:
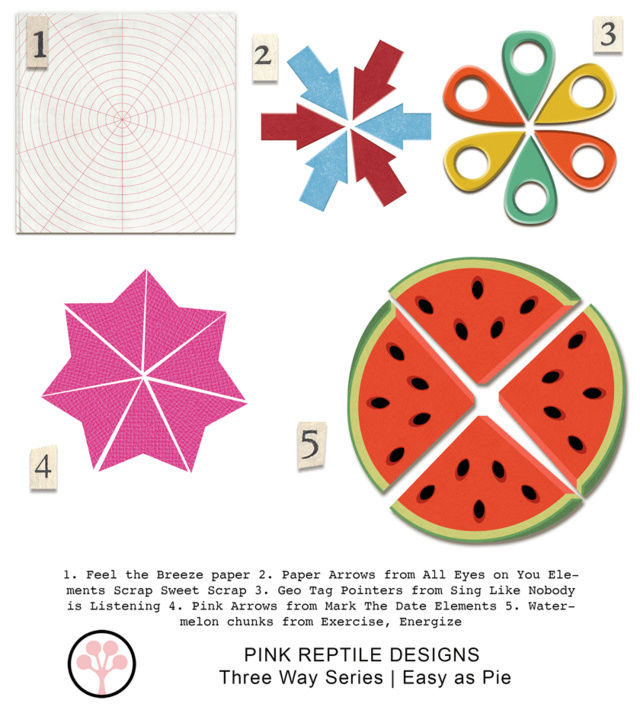
2. The second idea I had to use pie charts is to try to find some element in our stash to sit in for the pie chart, instead of making one on our own. Geo tags, little arrows, watermelon chunks, and even patterned papers can work as pie charts!
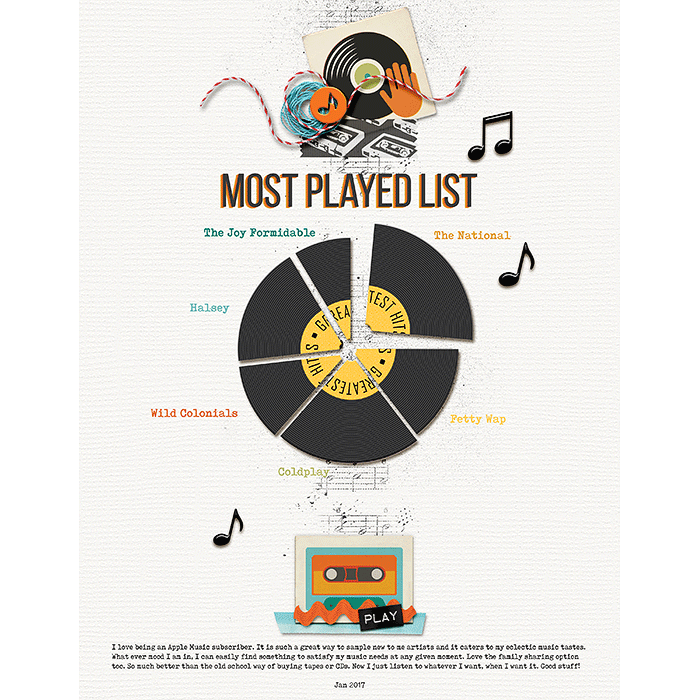
Here’s my page taking a cute record element from Don’t Stop the Music and using it to record my top most played artists on Apple Music at the moment. Any round object from your kits can work great as a pie chart if you simply cut it up into chunks!
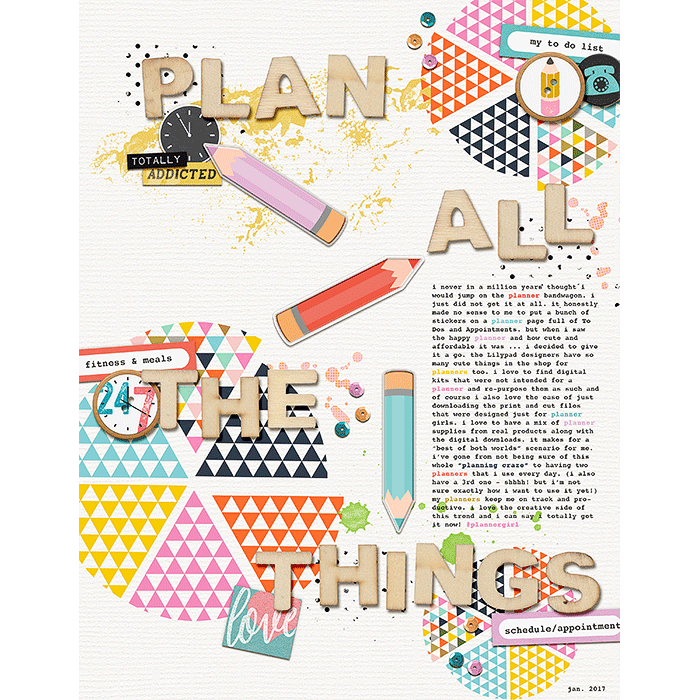
3. The last idea I had was to just use the pie chart as more of an overall design element on the background of my page rather than letting it represent a chunk of time or my favorites. I chose to scrap about my planner addiction so it still kind of ties in with the theme of chunks of time but it is in no way literal. So this third option uses the pie chart repeatedly in the background and almost acts like a patterned paper custom made by you! It can be used on any type of page at all and just adds color and whimsy to the page!
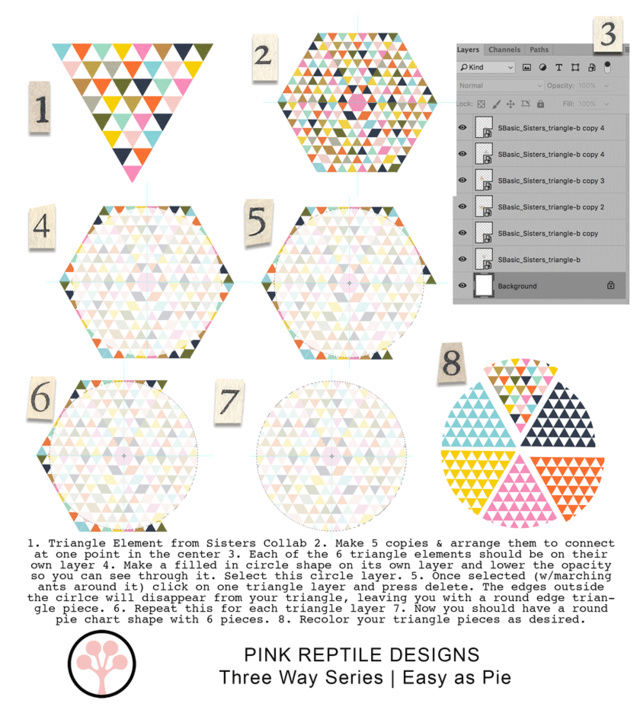
I've included my process in the graphic above, but to recap basically I just grabbed a triangle element from the Sisters Collab with Studio Basic and made a pie chart by combing them all together - merging all the layers into one. Then drew a big circle and used the method in Example 1 above to cut the circle out. Then I left one chunk in the cute multi colors and just recolored each of the other chunks. Here is how my final version of using pie charts on our pages turned out.
So what do you think? Do you have any fun ideas for using pie charts on your pages brewing? I’d love to see and hear your ideas!
I love this entire blog post and every single page you made. Thank you for the inspiration! I'm currently working on a page for this challenge and may have to do another one because it's been so fun.
ReplyDeletelove love love your pages Jenn! Great uses, yet again. <3
ReplyDeleteThanks ladies! xoxo
ReplyDelete