
Hello fellow scrappers! In this edition of hybrid scrapping I want to show you a super original project for easter.

I stumbled upon some beautifully decorated egg boxes on Pinterest and wanted to make one too! Fun detail: There's a surprise in there!
HOW TO
The first step is to clean the egg-box and remove advertising papers and stickers to obtain a solid egg-boxe like this :

I began by decorating the inside of box. You could begin on the outside by it's more difficult to work inside if the top is already decorated.
I cut the two columns inside the box to obtain a "flat" work area.


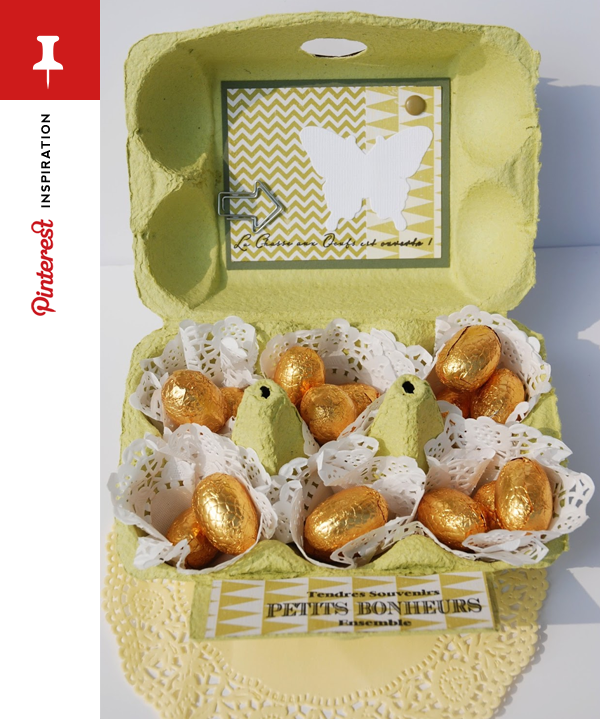
I then cut a rectangle from a patterned paper that I printed before[from Growing Pains | Papers by Pink Reptile Designs], and stuck it to the inside of the lid.

Now the outside of the box.
I chose spring colors to make my box : pink, purple, yellow and green.
I cut a strip of pink paper and I glued it on the edge [from Limitless | Papers]. Don't forget to cut out the two holes for the closure of egg-box!

I added a piece of paper to cover the top of the box. I chose a pink paper with white dots [from Sea of Love | Papers]

An egg-box is a small area to decorate. I chose a light pattern paper for the top so I can decorate with several elements without overloading the decoration in general.
I made a cluster on top of the box and when I was sure I liked it I started glueing all the different pieces on the top. My cluster contains leaves that I cut with a die [from Kesi'ar]), 2 pieces of papers and a tag [from Kesi'art]. Papers are from Limitless | Papers.

Half way glueing my elements I add several drops of black ink before continuing my decorations.

I added a cute little rabbit to get that easter atmosphere to my egg-box and I added a bunch of colored dots.

Then some leaves on the edge ...

And big letters to finish my box!

And the decoration is all finished!

The last touch is to add some candy for the kids; a yummie surprise hidden inside the box!
I put a doily in each case to keep the chocolats in place.

As always I hope you enjoyed my post and if I inspired you in any way, shape or form then by all means make a photo of your projects and upload it to your gallery so you can leave a link in the comment section below! I'd love to see what you made!
Happy Easter!
No comments:
Post a Comment
Note: only a member of this blog may post a comment.