
Last month, we focused on general preferences for Adobe Photoshop CC. This time, we’ll talk about setting up a more personalized workspace. Many of us digitally scrapbook for quite a while using the default workspace without even thinking to customize it at all, or knowing that we could. I know when I first started scrapbooking using a laptop computer there weren’t many ways to change up my space just due to the limited amount of visibility on a smaller screen. Often, we now have widescreen monitors and you can definitely make the workspace a lot more scrap friendly with just a few steps.
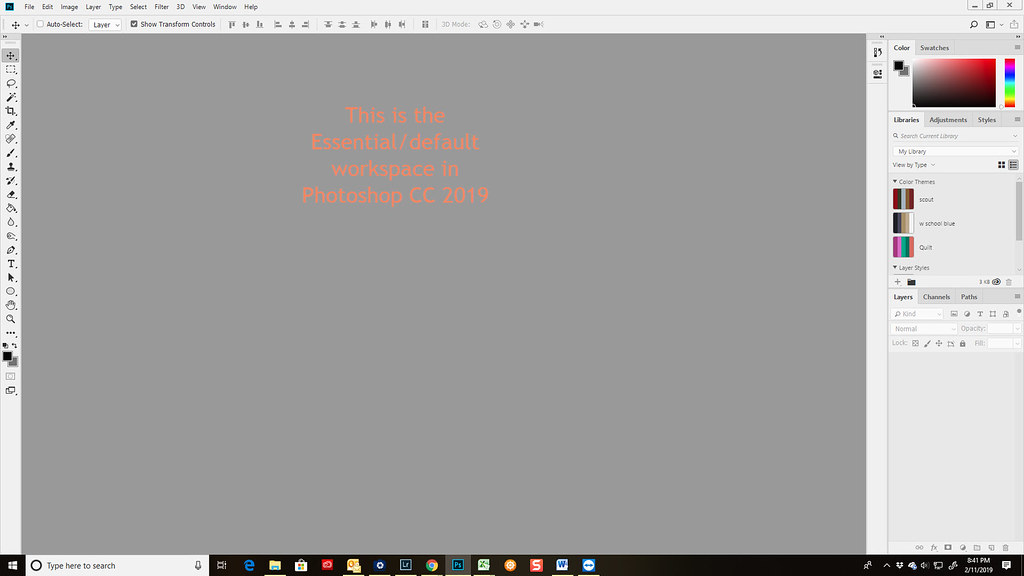
Let’s start with the default workspace:
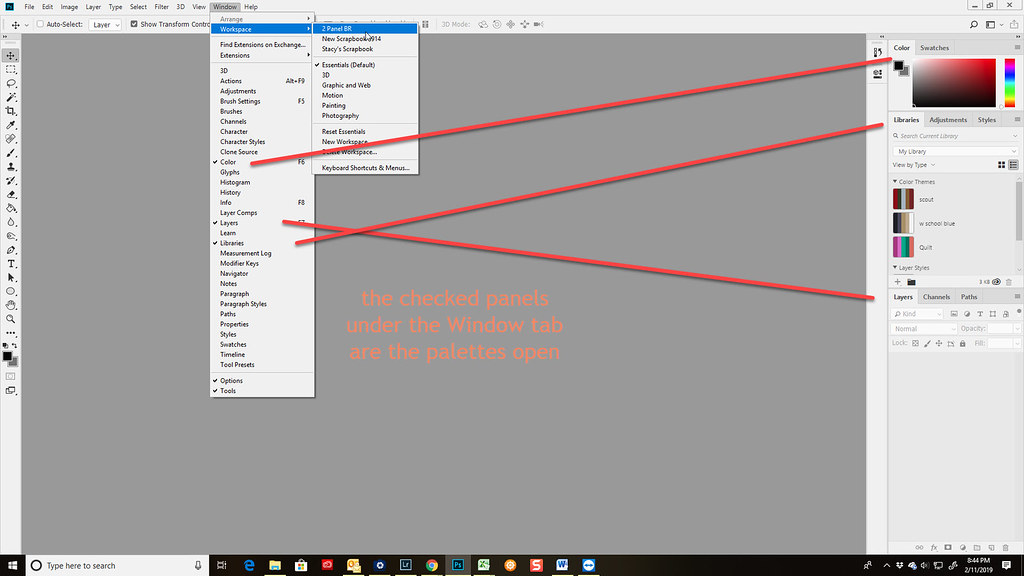
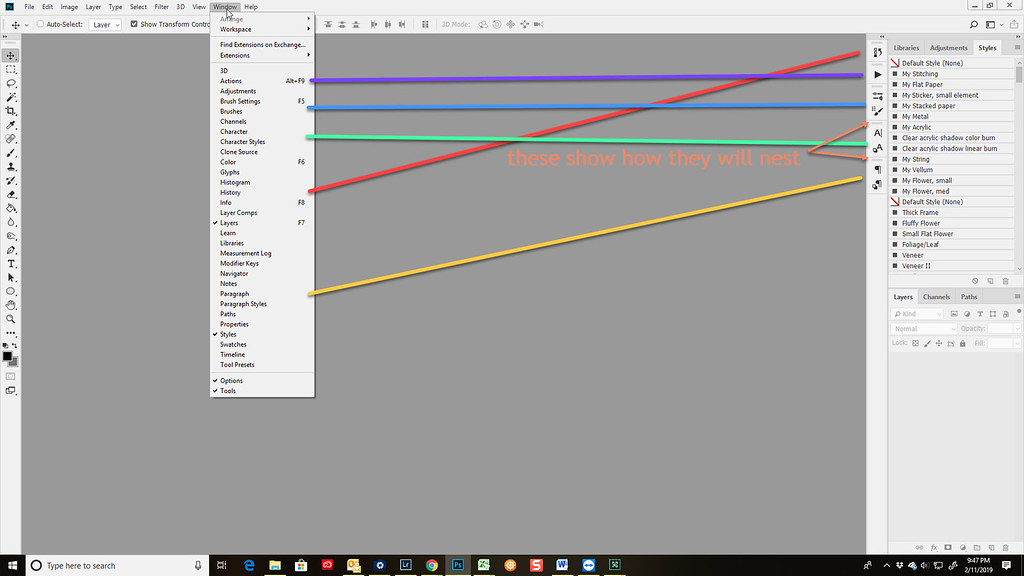
If you pull down the Window tab at the top, you’ll notice the items with checkmarks are the ones that appear in the panel along the right hand side.
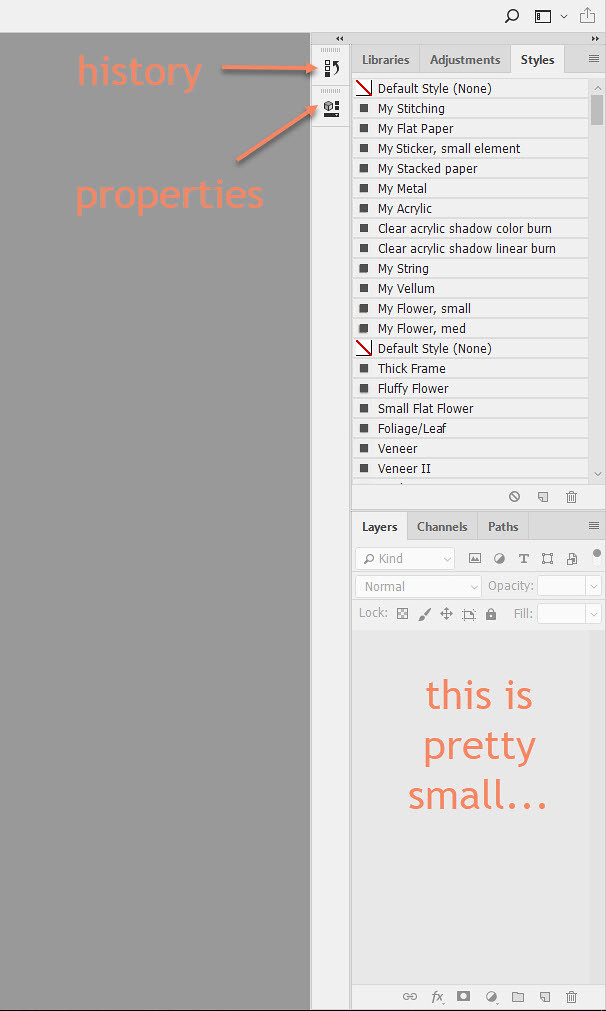
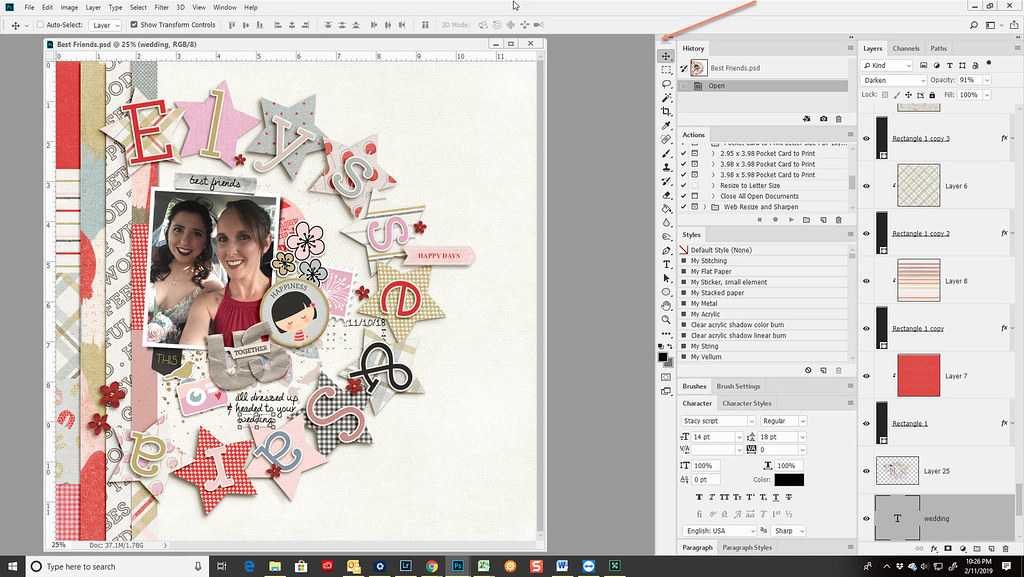
You’ll notice a small strip on the right docked next to the main long panel with a couple of icons in it. Hovering over the icons, you’ll see it’s the History panel and the Properties panel. I like scrapping with the History panel open but the Properties tab isn’t necessary (for me). Now that you can undo multiple times with Ctrl Z instead of just one, perhaps I’ll stop using the History panel but for now I’m used to it.
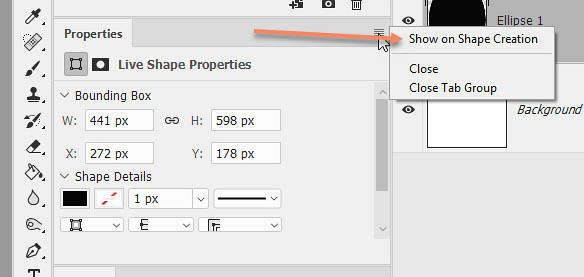
NOTE: It used to frustrate me that the Properties panel would pop back up whenever I drew a shape and I would have to hide it again. There is a fix for that! WITH A SHAPE DRAWN on a layer, you can click on the little three line/option menu and uncheck Show on Shape Creation, then close the tab group and it won’t automatically reappear.
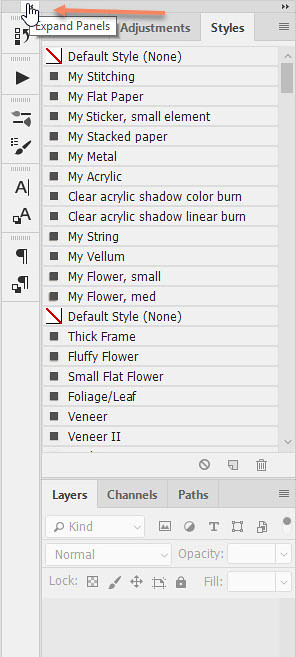
Because I have a wide screen monitor and I scrap in a 12 x 12 square format, I have plenty of screen “real estate” for another wide panel on the right instead of just the skinny strip holding the extra panels. So using the Windows tab at the top I’ll open up several other panels that I use all the time like Styles, Actions, Brushes and Settings, as well as Characters and Paragraphs for text.
Notice the little dividing lines between every icon or two. Those dividers show how the panels will be displayed. Those with two icons between dividers will be “nested” together in one panel such that you can switch back and forth. I use those when it makes sense to do it like with Characters and Character Styles. You can move them up and down and change the order to your preference.
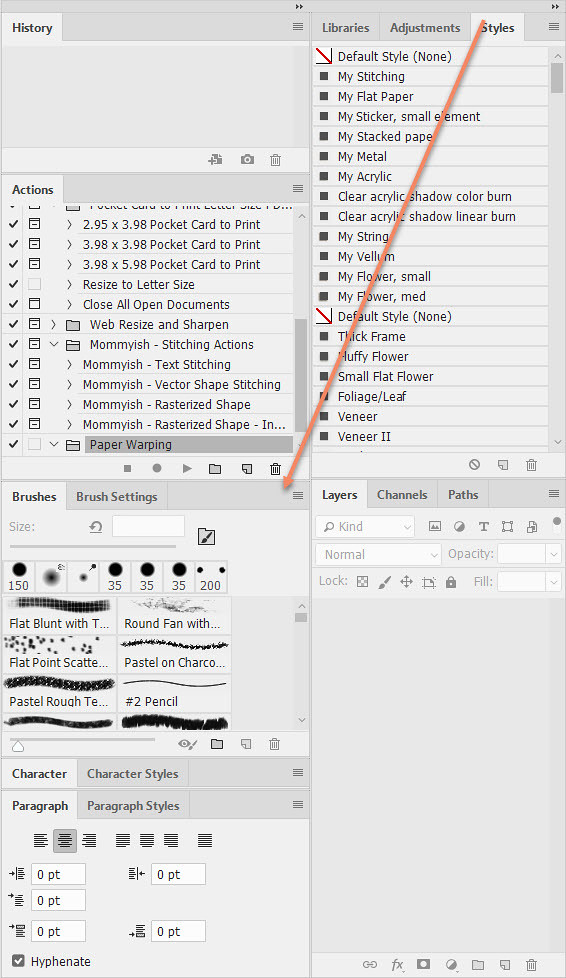
Now, I’ll expand the small strip into another large vertical panel by clicking the two tiny arrows at the top of the skinny strip. I could even make these two vertical panels thinner and add a third if I wanted to open more panel options.
Now THAT’S better! I’ll have a much easier time scrapping when I can see everything I use most often. I just have one problem… that Layers palette is WAY too small! You end up with so many layers in a psd/tif file and scrolling up and down is tedious. So I’ll move the Styles panel over into the other tools panel.
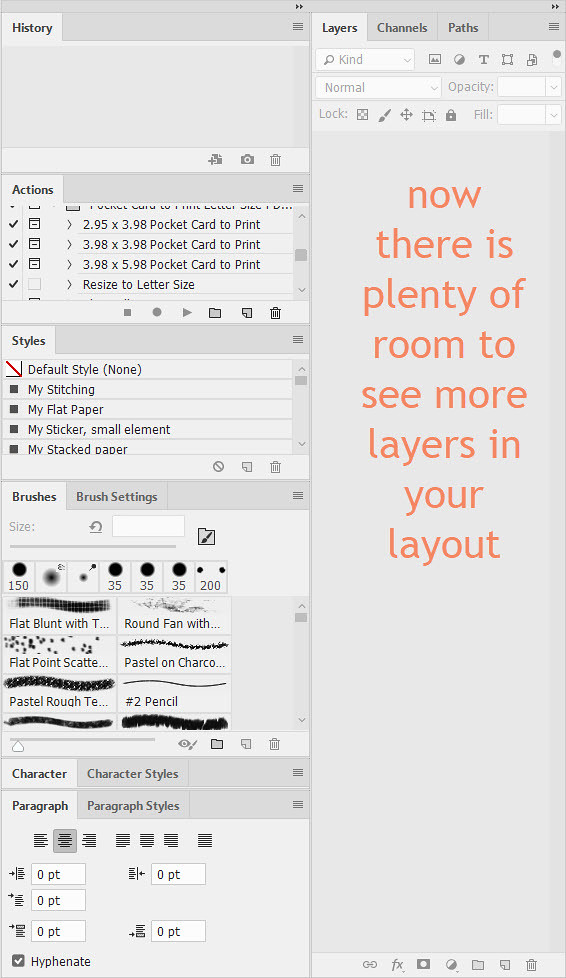
This will make it much easier to navigate around on a scrapbook layout!
My last step is to move the Tools bar from the left hand side over and dock it next to the rest of the panels. Now, the entire left side of my workspace is dedicated to my layouts and all of my tools etc are on the right. No more going back and forth across the screen.
 9full screen tools moved by Stacia, on Flickr
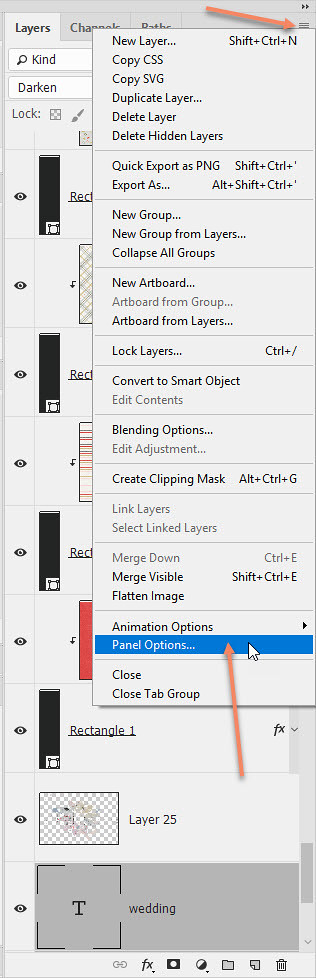
One other customization that I’ve made in order to see my layers better is to change a couple of those panel options. Click on the three line/option menu and select Panel Options.
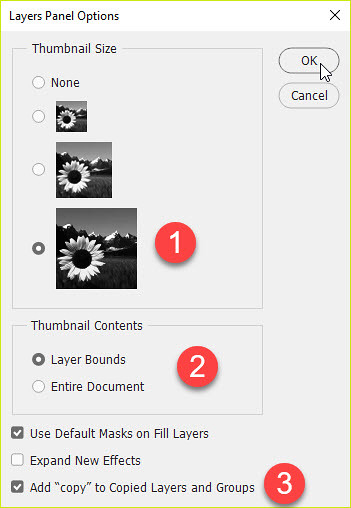
I like the largest thumbnail size but that is totally personal preference. I also LOVE the layer bounds option checked. That way I can see much more clearly what layer that I’m on by seeing the shapes on layers more easily. I also use the add “copy” to duplicates option so that it’s easier to differentiate between original elements like flowers and their copies when I start resizing and moving them.
I hope you picked up a few helpful tips that you can use for your own customization. Note that HOW you set up your workspace is totally dependent on your workflow and which tools you use most frequently. So move things around, try out different options. You might even consider having a workspace for digital scrapbooking AND another workspace configured differently for photo-editing if that’s your thing. The important thing is to SAVE your customized workspace so that you can get it back in case your system is somehow reset during an update. { Not like that ever happens, right…? ;) }
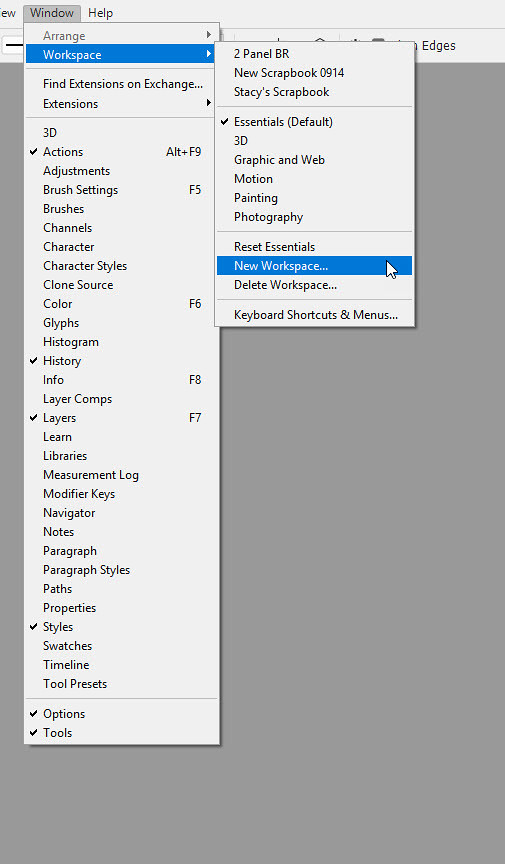
To save your customized workspace - under the Windows tab, selecting Workspace, pull down to New Workspace. You’ll get a dialog box asking you to give your new workspace a name. You’ll also have the option to save customized keyboard shortcuts and tool options as well if you so choose.
Tell me, have you customized your workspace? What’s the thing you love the most about it?
No comments:
Post a Comment
Note: only a member of this blog may post a comment.