
Have you ever watched a digital scrapbooking process video and wondered how the scrapper got their Photoshop screen set up just that way? I thought I’d focus my next couple of blog posts on customizing your PS workspace. Today, we’re going to look at our preferences. (images shown from Adobe Photoshop CC 2019)
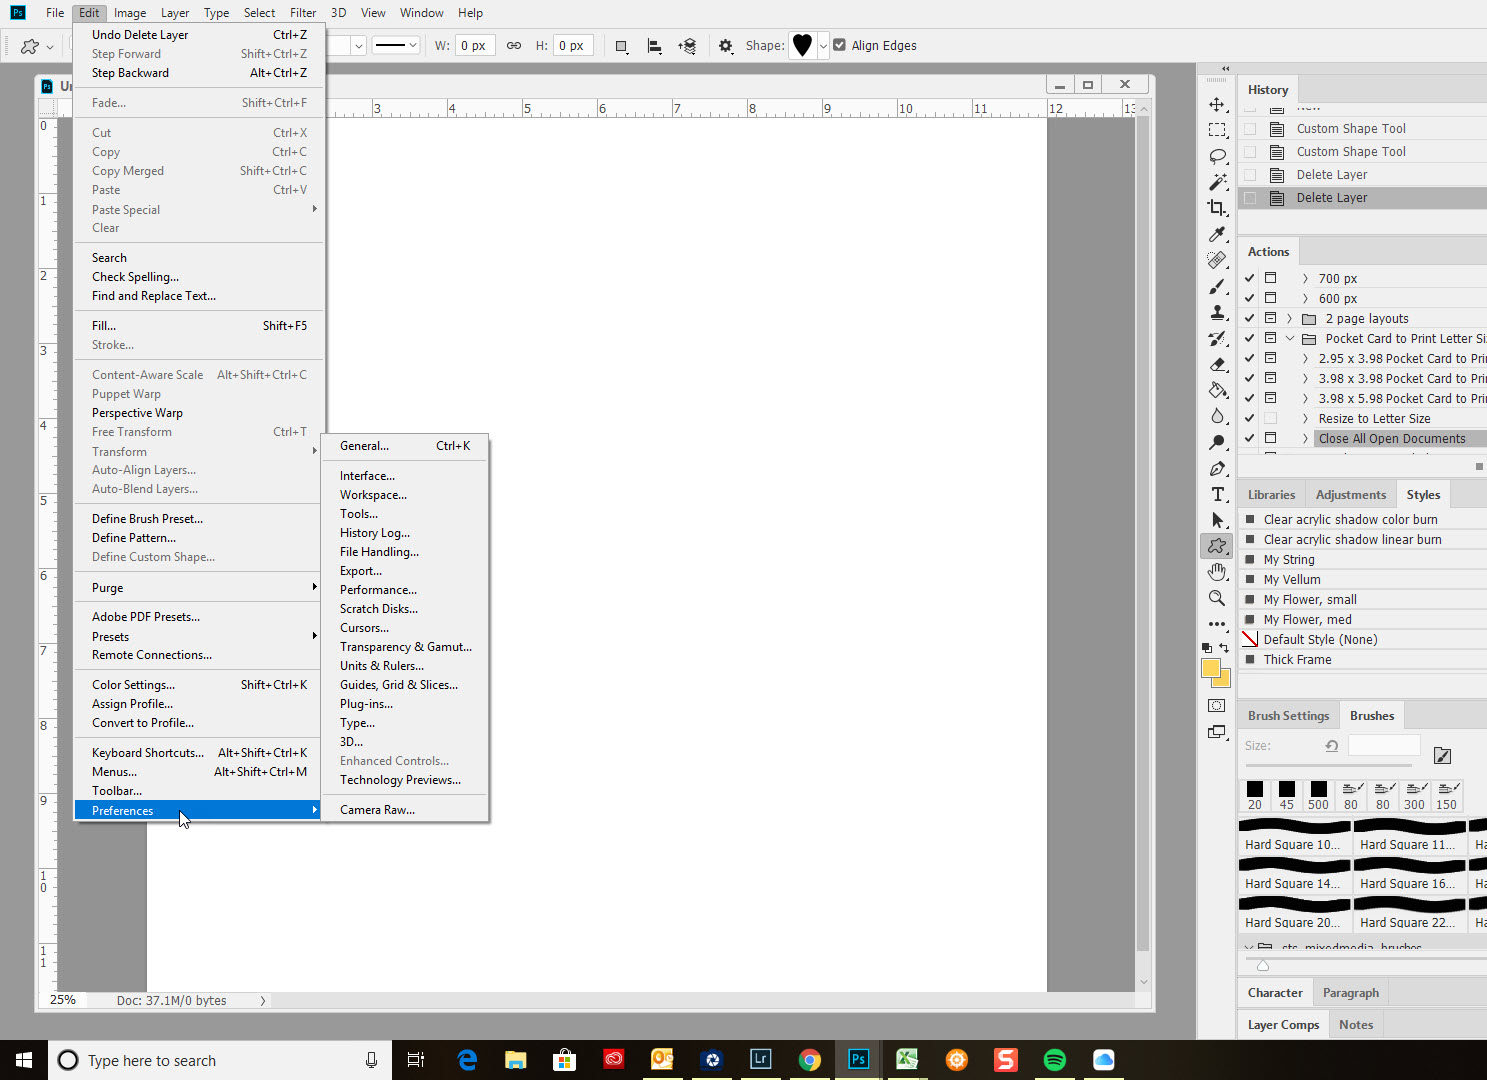
From your main Photoshop screen, click on Edit at the top and pull down to Preferences.
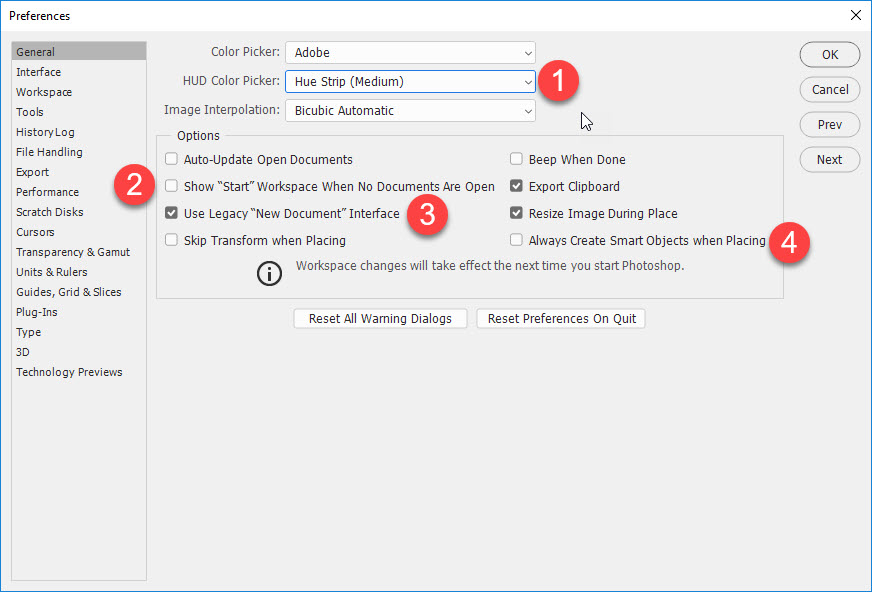
The HUD (Heads-Up Display) Color Picker where you will select your preferred colors can be either a strip in a couple of different sizes or a color wheel, whichever works best visually for you. One of the new features in the recent CC updates is opening to a Start screen instead of a blank workspace. I’ve personally chosen to use the legacy view because I don’t like PS closing up when I exit a document. Many scrappers import/place files as smart objects and you can set that as a default here.
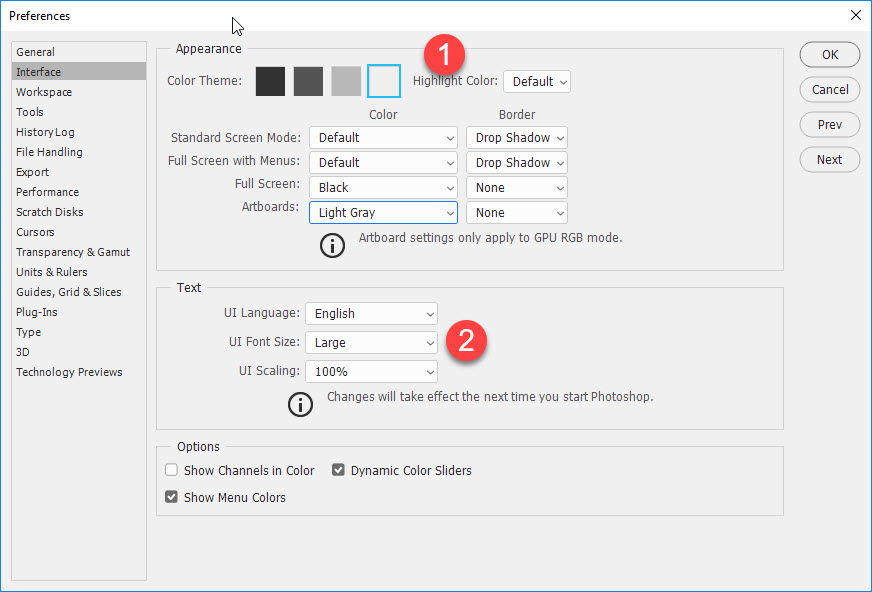
Here’s where you can make a big difference in your workspace very easily by changing the color theme. Why not change yours up and see if you like a different one? It’s super easy to change back. And for others like me, having the ability to change the default font size can be very helpful.
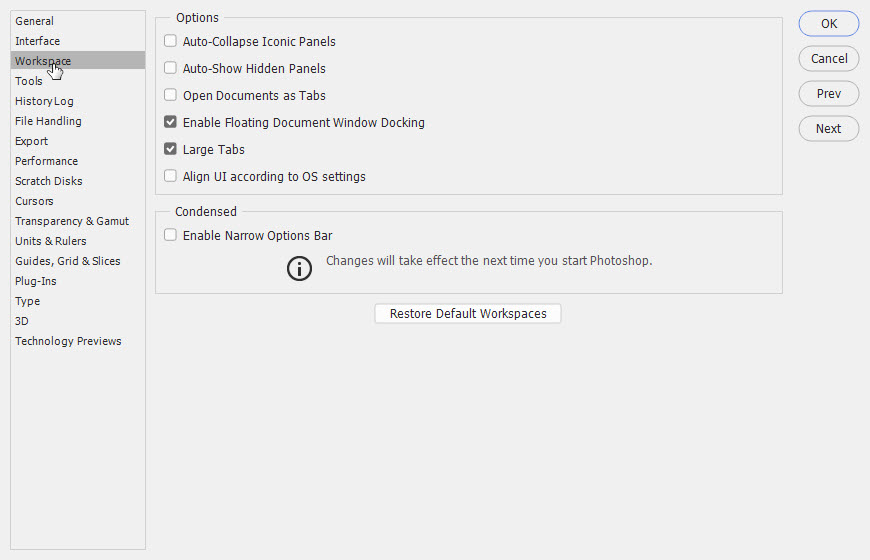
I notice that other scrappers like the tabbed approach for opening their files for scrapping. I like to use the floating windows so that I can move things around more easily. I think it’s a personal preference. I also haven’t chosen any condensed options in my own workspace but they could definitely give you more scrapping “real estate” on a smaller screen like a laptop.
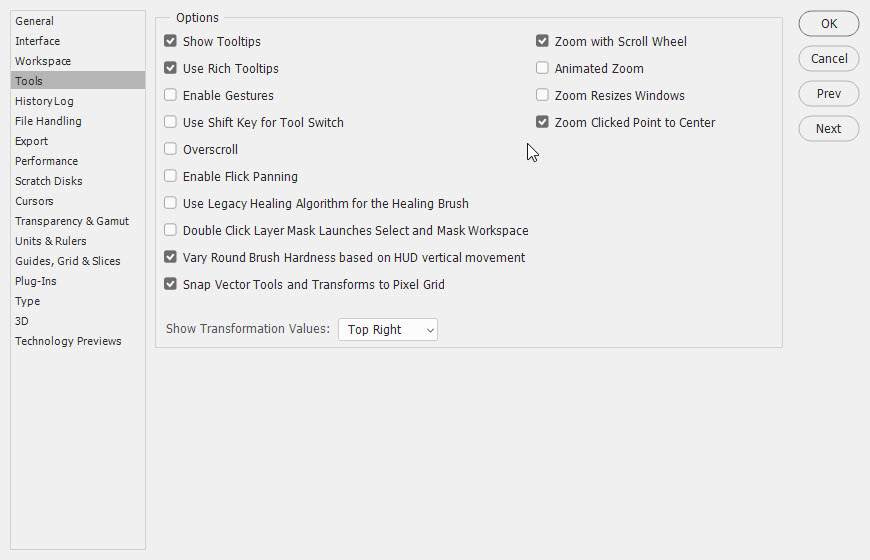
I like having the tooltips turned on especially for lesser used tools and options. I also love that “zoom with scroll wheel” option. I can’t scrap without it!
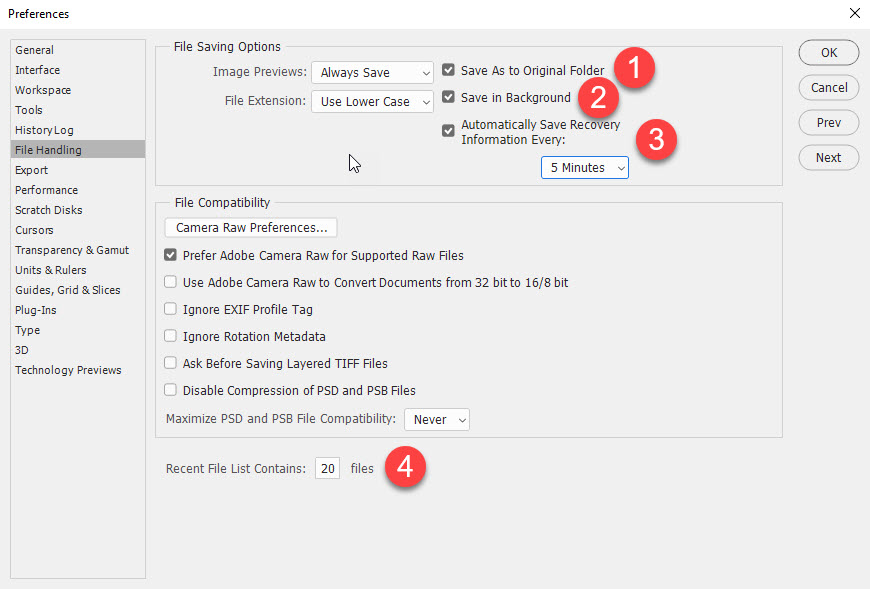
I like to have my documents at least point to their original folder when saving them. You can always change it before saving. This screen also has another must-have choice, an auto-save option. I have mine set to a short interval. Auto save has certainly saved my bacon when creating a layout a time or two! You can also set your recent file list to contain more than the default number of files.
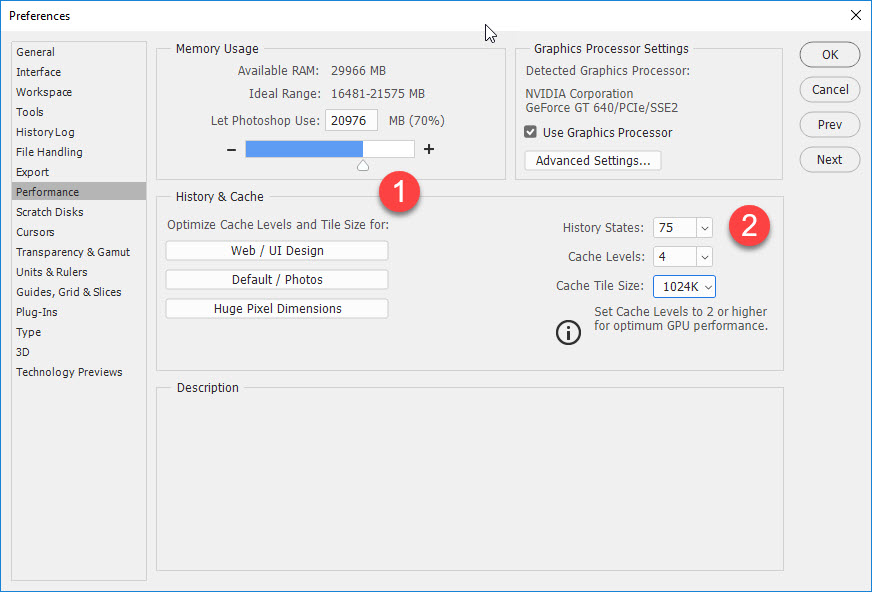
Back when I started scrapping, it was suggested that you let Photoshop use about 70 – 75% of your RAM for less of a time lag when scrapping and I’ve continued to use that setup. I have my history states set pretty high so as to be able to go back in the history panel in case I make a mistake and need to re-do a step or more quickly.
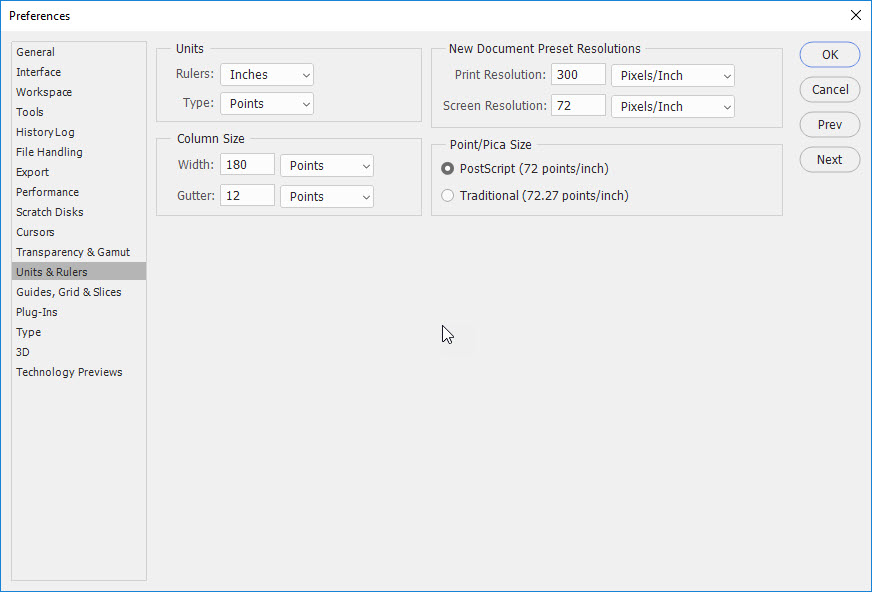
A spot to set your default unit of measure as well as screen and print resolution.
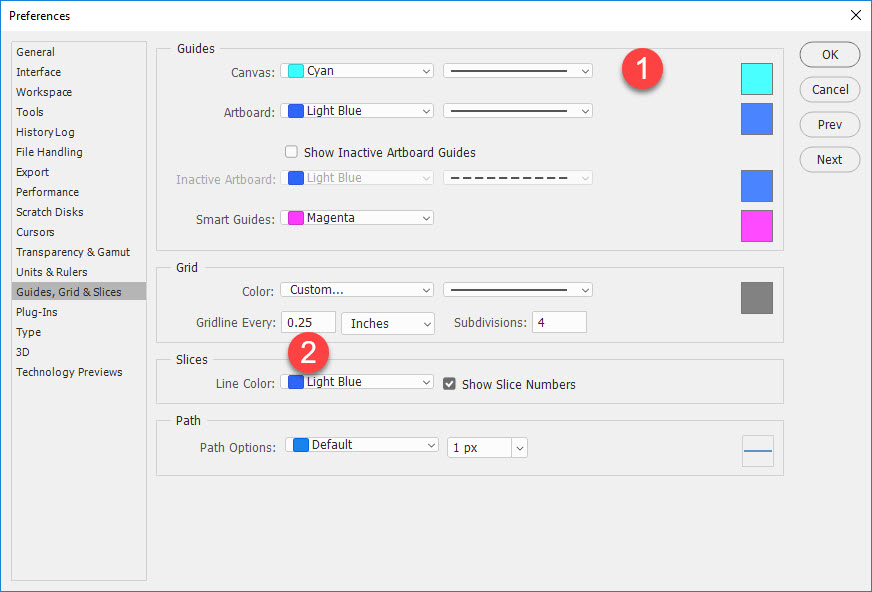
Here you can set the color of the vertical and horizontal guides you can use to align elements, photos etc. You can also set the spacing of the lines when you choose to display the grid. This comes in really handy for even spacing of borders and gutters between items as well as when scrapping in a pocket format.
Of course, there are several more sub-menus under preferences that I haven’t discussed. I have left those to their default settings. Many of them include choices that are rarely used when digiscrapping but more for 3D graphics and graphics design.
Next month, we’ll customize our workspace with panels and tools we’ll use for scrapbooking.
From your main Photoshop screen, click on Edit at the top and pull down to Preferences.
The HUD (Heads-Up Display) Color Picker where you will select your preferred colors can be either a strip in a couple of different sizes or a color wheel, whichever works best visually for you. One of the new features in the recent CC updates is opening to a Start screen instead of a blank workspace. I’ve personally chosen to use the legacy view because I don’t like PS closing up when I exit a document. Many scrappers import/place files as smart objects and you can set that as a default here.
Here’s where you can make a big difference in your workspace very easily by changing the color theme. Why not change yours up and see if you like a different one? It’s super easy to change back. And for others like me, having the ability to change the default font size can be very helpful.
I notice that other scrappers like the tabbed approach for opening their files for scrapping. I like to use the floating windows so that I can move things around more easily. I think it’s a personal preference. I also haven’t chosen any condensed options in my own workspace but they could definitely give you more scrapping “real estate” on a smaller screen like a laptop.
I like having the tooltips turned on especially for lesser used tools and options. I also love that “zoom with scroll wheel” option. I can’t scrap without it!
I like to have my documents at least point to their original folder when saving them. You can always change it before saving. This screen also has another must-have choice, an auto-save option. I have mine set to a short interval. Auto save has certainly saved my bacon when creating a layout a time or two! You can also set your recent file list to contain more than the default number of files.
Back when I started scrapping, it was suggested that you let Photoshop use about 70 – 75% of your RAM for less of a time lag when scrapping and I’ve continued to use that setup. I have my history states set pretty high so as to be able to go back in the history panel in case I make a mistake and need to re-do a step or more quickly.
A spot to set your default unit of measure as well as screen and print resolution.
Here you can set the color of the vertical and horizontal guides you can use to align elements, photos etc. You can also set the spacing of the lines when you choose to display the grid. This comes in really handy for even spacing of borders and gutters between items as well as when scrapping in a pocket format.
Of course, there are several more sub-menus under preferences that I haven’t discussed. I have left those to their default settings. Many of them include choices that are rarely used when digiscrapping but more for 3D graphics and graphics design.
Next month, we’ll customize our workspace with panels and tools we’ll use for scrapbooking.
Thank you so much for sharing this. I learned a lot and changed a few of my settings to match.
ReplyDelete