
Hello and Happy Spring if you are in the northern hemisphere. I love Spring because it means saying goodbye to my least favorite season ... winter. I get to look forward to warmer weather, green grass, and flowers! The only problem is that Mother Nature seems to think its still winter and keeps dropping more snow upon us! Not fair. But that’s OK. I’ve been so busy lately, I don’t really have time to enjoy being outside much anyway. Each week my weekly planner page is a scribbly mess of notes, lists, and appointments. It’s getting to the point I can hardly decipher what I really need to do and where I need to be each day. So, I thought it was time I get a little more organized in my planner and perhaps add a little color to make up for the drab, dreary view of winter still lingering outside my windows.
One of the things I love to do is take a digital scrapbooking kit and create a custom sticker sheet just for my planner. I love that I have something unique and that I get to take a small timeout just to play and create for a few moments. This is especially thearuptic when I don’t have a lot of time for a full scrapbook session. So today I’m going to show you how I create a custom sticker sheet from a digital scrapbooking kit. If you’re not a planner … consider how you could use a custom sticker sheet in other ways. Maybe as stickers for your kids to play with? Use them on greeting cards or on envelopes as seals. They would be super cute to mark up special dates on a wall calendar too!
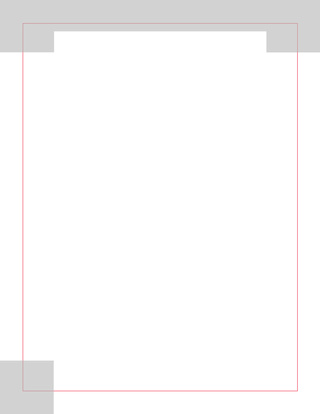
The first thing I do is open an 8.5 x 11 document in Photoshop set to 300 dpi (since I will be printing it). You can easily fussy cut the stickers out by hand, but I usually end up running them through my Silhouette Portrait (so I don’t have to do the cutting myself). I have a little template that I place over my 8.5 x 11 background so I know where to place my elements and can avoid the borders and edges that might not print or cut properly. I keep it set to a low opacity so it is just slightly visible. This just functions as my guide so I don’t inadvertently place anything in those borders. I find this works best for cutting with the Silhouette. Here's the Silhouette cutting guide download if you want to grab it ... CLICK HERE! If you are cutting the sheet out by hand after printing you will not need this template guide. Here is what it looks like:
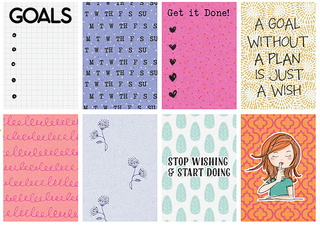
My happy planner boxes are about 1.5 x 2.25 so I use the rectangular marquee tool set to that exact dimension to draw a rectangle with those measurements. Then I duplicate it a few times. I clip some pattern papers to the rectangles. Some I leave blank to write on and others are just to add some fun spots of color in my weekly planner spread. Some I will add some Word Art for functional uses or even just happy inspirational quotes to motivate me during the week. For this week's spread my Happy Planner colors were sort of melon and orange and I was excited to see it perfectly matched with Pink Reptile Design's New Beginnings kit. This kit is Goal oriented and has a cute planning and To Do list theme that really works for creating a custom planner sticker sheet. I loved the cute little bullet stamps too and used some on my 1.5 x 2.25 boxes. These will make a perfect spot to list all the things I have to do during the week. Here's a closeup of my little boxes:
Then I grab a few cute elements to decorate the planner and make it pretty and fun to look at. This fills up the rest of the 8.5 x 11 document. Many of these items double as functional pieces too. For instance, I love to use round little elements, like brads, to mark appointments or kid's practice times. I love little labels for noting things to do on certain days. Arrows and banner flags are great little elements to mark important dates as well. I find the more colorful and pretty my weekly spread is, the more I am likely to look at it and stay on top of my To Do lists!
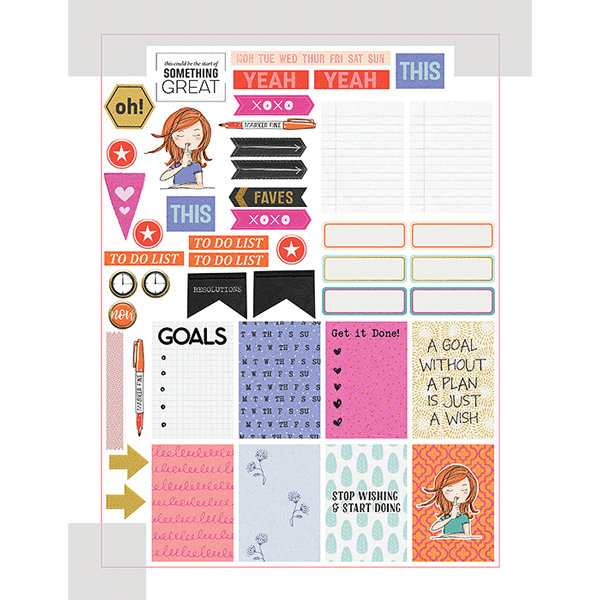
Here's my final sticker sheet. You can see the template guide marking the edges to avoid (download cutting guide template here).
As I mentioned earlier you can run this through your Silhouette or fussy cut the stickers out by hand. I print on Silhouette's white sticker paper, but you can use any sticker paper you like. Most of the big box office supplie stores have their own brands or you can find some on Amazon.
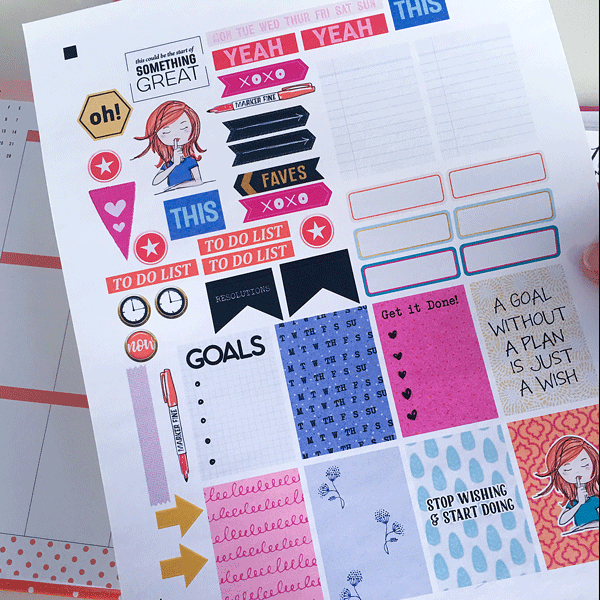
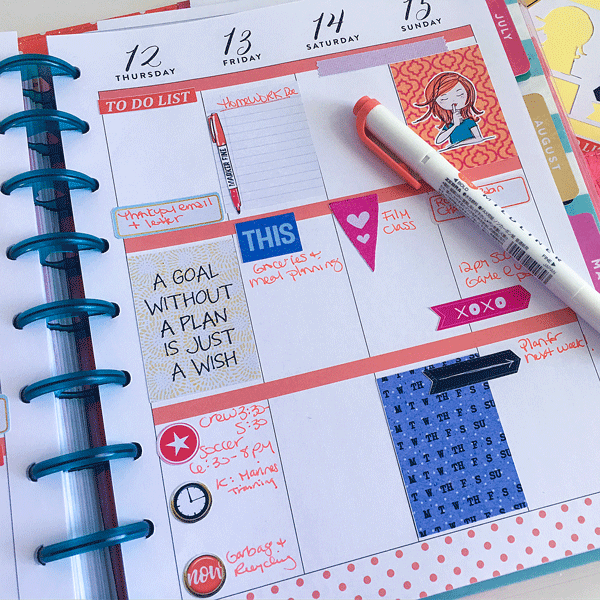
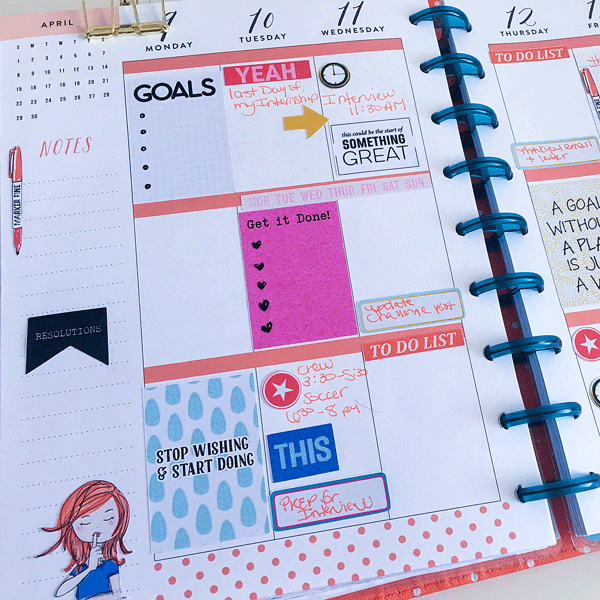
Here are some photos of my sticker sheet after I printed them and also some photos of the stickers being used in my planner spread.
So that's it! I just grab elements and make some fun boxes to fill up my 8.5 x 11 document. I print it out at 300 dpi. (If using Silhouette to do the cutting I pull the document into Silhouette's software and print registration marks before sending it to the printer. There are lots of tutorials for Silhouette print and cut. That is beyond the scope of this tutorial.) Finally, I cut the stickers out & add them to my planner. I love having the flexibility to print just the stickers that work for me so there is no waste and I get to stretch my stash so I am using my kits for more than just scrapbook pages!
So fun! Love your planner layout. I started doing this too. For those things that happen every week, I chose an element related to the event, added the time, then printed a bunch on my sheet. For ex: I used the two girls sticker from PRD's Sister kit for my Saturday morning get together with my 2 friends.
ReplyDeleteI love it! It's so fun to pick and choose things that work for us personally in our planner and control how much we print. I love planner ready to print kits - but I always have stuff I'll never use. This custom sticker sheet making process just works so much better for me. TFS your ideas Bev! xoxo
DeleteThe Cosmetic Boxes brings you Custom Car Stickers Online. Car stickers are customized stickers that molded into your demands. We borrow your idea and enhance it with our experienced team. We endeavor to bring all the virtues that any good sicker can have. The Cosmetic boxes struggle to make the best quality stickers through excellent quality off-set printing.
ReplyDelete