I decided I wanted fabric covers because I love the look. Of course not the best choice for your to go to cook books. I mean there's a reason the original covers are tattered and stained. But when my mind is set on something I see only challenges and no problems that are too big they can't be solved. I managed to come up with a solution and lo and behold it worked! I thought it might be fun to share how I did it so you can copy my idea if you want to. I mean... it's not just for cook books! LOL
Here's my final result. Volume 1 is covered with a small plaid cloth and Volume 2 with a bigger one. The green binder next to the 2 of them contains my hand written recipes.

MATERIALS USED
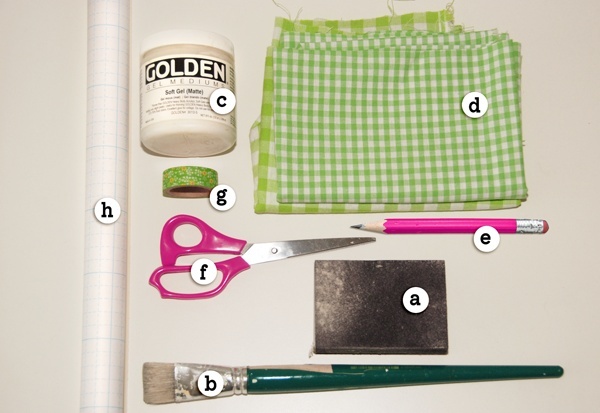
a. sanding block, b. brush for applying the gel medium, c. gel medium [you could also use mod podge or something similar], d. fabric [not too wrinkled otherwise you best iron before using it], e. pencil or fabric crayon to make marks, f. scissors, g. decorative tape, h. contact paper
PREAPARATION
Before I started on my covers I sanded them with a sanding block [a]. It's how I got rid of grease and stains so my gel medium would actually stick to both the fabric and my cover. If you are using a new book, notepad or journal you can probably get away with skipping this step but I'd give it a little rub anyway just to be safe. Then I wiped of my book covers with a damp cloth to get rid of the sanding dust.
HOW TO
After that I opened one of the books and laid it down on the fabric that I marked all around, including a hem of approximately and inch [2,5 cm]. Then I cut the fabric to size.
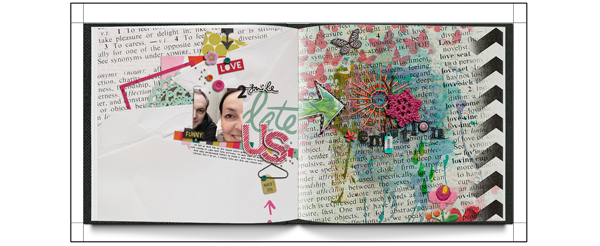
Next I closed the book and added gel medium all over the back side and spine, making sure I covered the whole areas. I then carefully placed back the book on the right side of the fabric and pressed the book down firmly. Make sure you check that it is smooth and securely adhered to your book cover. At this point your fabric is just stuck to the back of your book and the spine is already covered in gel medium. I then added gel medium to the front cover, grabbed the fabric and carefully pulled it against the spine and over the front cover while rubbing it with my free hand to make sure I got rid of air bubbles and wrinkles. I turned the book and also rubbed the back neat and tight. My book now looks the same as in the image above with the only difference that now the fabric is glued to the covers.
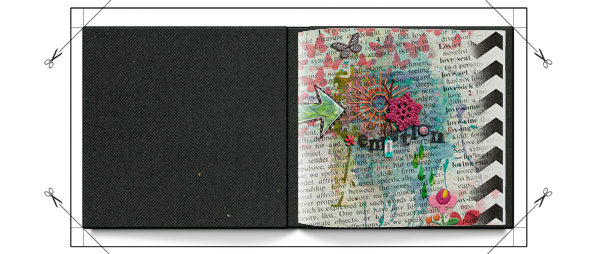
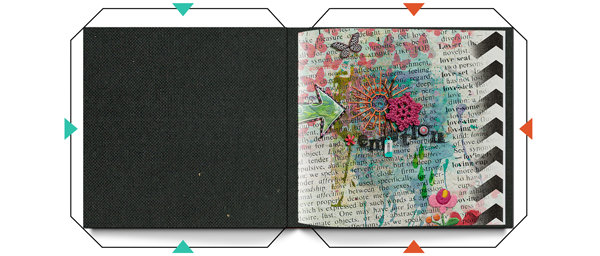
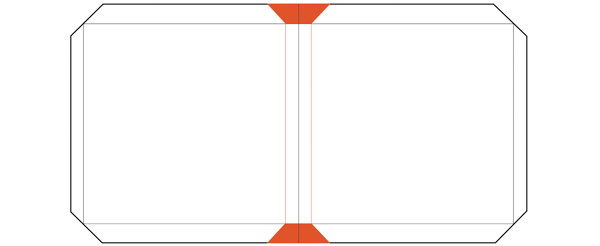
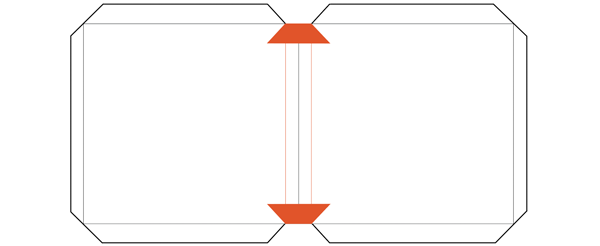
It's the hems I need to deal with now. For this I cut off all cornes at angle of approximately 45 degrees leaving about 1/8 of an inch [3 mm] margin between the corner and the edge of the cut.. You could make marks but it's not a problem if the angles slightly differ so I did it on sight.
I made two cuts in the fabric by the spine also at an angle of app. 45 degrees. The cuts should end with where the cover creases. Do this on both ends of the book.
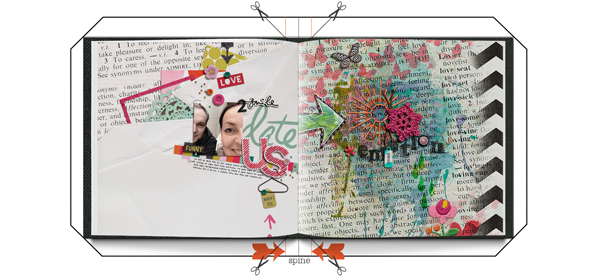
Now add some gel medium all around the edge of the left inside of your book and smooth the fabric over the edges. Pay attention to the corners and make sure you pull the fabric firmly over the edges. Do the same for the right inner side of your book and the spine bits. I was covering a binder in which case the spine bits are very easily to smooth over the edges since there's lots of room to work. If you are covering a book you'll want to make straight cuts that allign with the width of the spine and add your gel medium on the fabric bits instead of the cover itself and push those bits down into the little gap between the cover and the binding with a letter opener or a knife.
Once I'd done both my books I left them to dry and continued working on them the next day when I prettied up the fabric edges with some decorative tape and repeated the whole covering process with contact paper to make them stain proof.


I absolutely LOVE this Mirjam!!! Your covered recipe books are awesome! I remember doing something similar back in my more creative days doing something similar with wedding photo albums as gifts! Your tutorial is wonderful and I just may have to try this again :) Thanks for the wonderful instructions... I just wish my counter space was as clean and bright as yours :)
ReplyDeleteChrista
Thanks Christa! ♥♥♥
Deleteooh I love this!! I don't cook, but This has my mind spinning in all directions on how I can make book covers...
ReplyDeleteThanks!! :D
<3
It's loads of fun I can tell ya Johanna and not that difficult. It's also a great way to personalize a journal or notebook. Great gifts with a personal touch too! I'd love to see whatever you make!
Delete