Tuesday, 22 March 2016

HYBRID | EASTER EGG BOX SURPRISE


Hello fellow scrappers! In this edition of hybrid scrapping I want to show you a super original project for easter.


I stumbled upon some beautifully decorated egg boxes on Pinterest and wanted to make one too! Fun detail: There's a surprise in there!
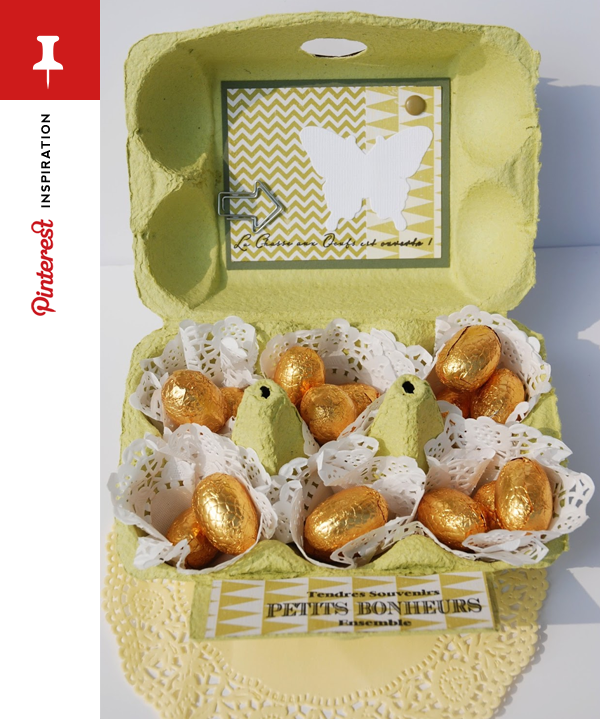
http://nataliascrap.blogspot.nl/2013/03/carterie.html
egg box by natalia scrap

 HOW TO
The first step is to clean the egg-box and remove advertising papers and stickers to obtain a solid egg-boxe like this :


I began by decorating the inside of box. You could begin on the outside by it's more difficult to work inside if the top is already decorated.

I cut the two columns inside the box to obtain a "flat" work area.


I then cut a rectangle from a patterned paper that I printed before[from Growing Pains | Papers by Pink Reptile Designs], and stuck it to the inside of the lid.


Now the outside of the box.
I chose spring colors to make my box : pink, purple, yellow and green.

I cut a strip of pink paper and I glued it on the edge [from Limitless | Papers]. Don't forget to cut out the two holes for the closure of egg-box!


I added a piece of paper to cover the top of the box. I chose a pink paper with white dots [from Sea of Love | Papers]


An egg-box is a small area to decorate. I chose a light pattern paper for the top so I can decorate with several elements without overloading the decoration in general.
I made a cluster on top of the box and when I was sure I liked it I started glueing all the different pieces on the top. My cluster contains leaves that I cut with a die [from Kesi'ar]), 2 pieces of papers and a tag [from Kesi'art]. Papers are from Limitless | Papers.


Half way glueing my elements I add several drops of black ink before continuing my decorations.


I added a cute little rabbit to get that easter atmosphere to my egg-box and I added a bunch of colored dots.


Then some leaves on the edge ...


And big letters to finish my box!


And the decoration is all finished!


The last touch is to add some candy for the kids; a yummie surprise hidden inside the box!
I put a doily in each case to keep the chocolats in place.


As always I hope you enjoyed my post and if I inspired you in any way, shape or form then by all means make a photo of your projects and upload it to your gallery so you can leave a link in the comment section below! I'd love to see what you made!

Happy Easter!


Tuesday, 15 March 2016

MARCH BLOG CHALLENGE

Hi everyone! Welcome to the March Blog Challenge! We have a special surprise for you this month, but before we share the details of our new monthly challenge, let's see who the winner for the February Challenge is!!! You can take a peek at all the awesome entries HERE .


And Barbara is our winner for this month!!!

Congratulations Barbara aka barbaraj!!! You have a notification on your TLP account.
All other participants also received their 25% discount coupons via their Lilypad gallery accounts. Please make sure you check your messages everyone and if your coupon didn't come through send an e-mail to pinkreptiledesigns at gmail dot com!

Here's Barbara's beautiful page:


For this month's challenge, we are super excited to share another template in our series of Template Freebies "Inspired by the Pink Ladies" where we take a page created by one of our talented Pink Ladies and turn it into a freebie template for you! This month's "Inspired by Freebie Template" is this RoCKinG template inspired by page designed by Diane Howard!!! Thanks Diane!

You MUST use this template for this month's challenge!
Just click on the image to grab it, it's FREE!

pink reptile designs

I absolutely can not wait to see your pages with this awesome template!


Check out these inspiring pages by the Pink Ladies:

by birgit
by gaëlle
by shivani
original by diane

Now let's see your rocking template skills!


Make sure you use at least 75% of Pink Reptile Design products on your page. Once completed, just upload your page to one or all of your galleries and post a link to your layout in the comments section of this post before the next challenge goes live on April 15th.

FREEBIES
Off course there's always a little something for free under the FB Free Gift Tab at the  and to be found HERE on the blog. :)


ONE lucky winner will receive a 10 dollar coupon to the PRD store, but really everyone is a winner, as all other participants receive a 25% discount coupon to the Pink Reptile Designs TLP store. So all the more reason to join in on the fun, right?!

Wishing you tons of fun and Happy Scrappin'!

Tuesday, 8 March 2016

SAN'S FAV CALLIGRAPHY FONT's

Way way back writing used to be a real job. There were no computers that did everything but the human hand wrote hours and hours and page after page and all of that with an old-fashioned dip pen and ink. Writing a book was a monks jobit took months to make just one book. All that was done in a beautiful graceful way; the art of calligraphy.


After the invention of the printing press the writing professions slowly becoming redundant. Since 1850 the interest in calligraphy revived. First as a hobby, but gradually calligraphy developed itself to an independent art form and now it is again quite hip to create beautiful hand-lettering.
Inspiration found on Pinterest

You can use calligraphy fonts for birth-announcements and wedding-event invitations, original hand-lettered design for logo’s, moving images for film and television or for just an adress on an envelop for snail-mail. Of course you can do it by hand too, there are many tutorials online to see how you can make a beautiful word with a brush pen. 

There are also many amazing calligraphy fonts online to help make your own invitations or an eyecatching title on your layout or just put a quote on a journal card. How about using one of these gorgeous free calligraphy fonts:


I still want to learn the hand-lettering, got all the things I need, just have to find the time!

Friday, 4 March 2016

NEW: MARCH BYOC | EXERCISE, ENERGIZE

January (check) February (check) March..... wow!

It is March already and boy is this year moving quickly! Many people have resolutions to make 2016 a healthier & fit year. What better way to document your progress, and get the momentum going [again], then with these 3 new packs I made for the March BYOC!

They will be on sale at 20% off through Sunday 3/6/2016. (*Please note, there is a special Bundle package/price for my newsletter subscribers!)

EXERCISE, ENERGIZE | ELEMENTS
This versatile set of elements in all shapes, forms, styles and textures was made with a super healthy life style in mind. Perfect for scrapping happy, healthy pages, resolution pages, hybrid projects and for adding cuteness to your journals and planners!
Includes:
53 unique elements, 62 in total

http://the-lilypad.com/store/Exercise-Energize-Elements.html

EXERCISE, ENERGIZE | ELEMENTS
A great set of 11 fun and fresh papers plus 5 beautifully textured matching solids.
Includes:
15 papers: 11 patterned papers and 5 matching solids

http://the-lilypad.com/store/Exercise-Energize-Papers.html

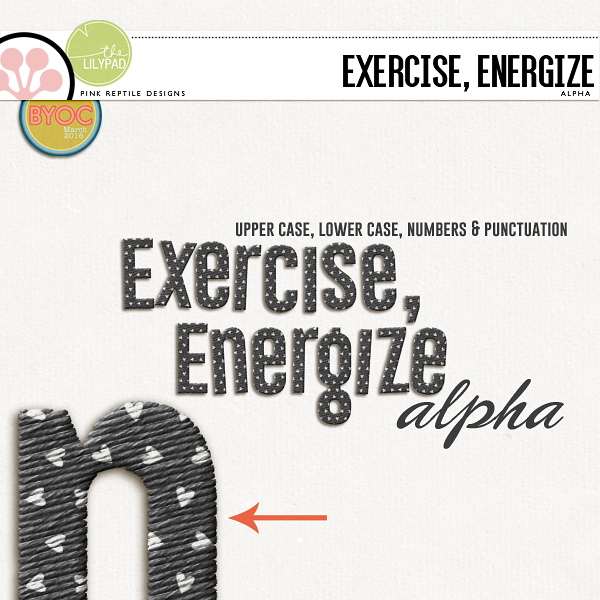
EXERCISE, ENERGIZE | ALPHA
A super sweet black embroidered alpha with little hearts, guaranteed to add a touch of cuteness and realism to your pages!
Includes:
upper case, lower case, numbers and punctuation [86 characters in total - all seperate .pngs]

http://the-lilypad.com/store/Exercise-Energize-Alpha.html

INSPIRATION

by danica
by ellen by li li
by susanne
by san by christa
by olga
by gaëlle

Wishing you a wonderful weekend and Happy Scrappin'!

Tuesday, 1 March 2016

TUTORIAL | DRY EMBOSSING PAPERS


Hi Everyone! Hope you are all doing great today! This is Jenn, aka jk703, here to bring you a super fun and pretty easy tutorial to give your pages a bit of a "pop." Literally! Here is the page I made: 


For my page, I'm using Mirjam's Lovebug collection of Elements, Papers and Alpha's that was released for the BYOC in February! If you haven't seen the elements, they are the cutest! Apart from that I used a template from Hearts To Love by Scrapping With Liz.

My layout was focusing on the teal, red and crafty colors. I wanted to make a pop with my background paper, but was also looking for a bit muted so the photos could shine. I decided to dry emboss my paper! Here is how I did this!

First, pick out two papers. One will have the pattern that you want, and the other will have the color that you want. I wanted a neutral color, kraft, and a fun background, large circle/polka! You will then open up your patterned paper in Photothop, and save it as a .psd file. Save it where you can locate it in a minute.


Here is what my layout looks with the kraft paper as the BG.


With that kraft paper selected in the Layers Palette, choose Filter > Texture > Texturizer. 


A BIG menu will appear, and you will look to the top right of the screen. Specifically, where the its bitsy lines and triangle are on the side. Click that, and load the texture. You will load the file you just saved above.


Once you load the texture, you will see it on the left side of the screen. Like this:


While it does have some embossed look to it, it seems too drastic of a change to look real to me. I am basing my opinion on my old stamping days, and dry embossing days. It was much softer, and less defined when I embossed with the light table and a metal stencil.

There are settings on the right side, under where you load the texture. Play with those. Enlarge the pattern, make it smaller, change the lighting, and try inversing it!

This looks a little better to me. I've enlarged the pattern, and set the relief to 8. I've also changed the light to come from the top right. This is in line with how I shadow as well.


Here, I've called it down to 55%, a 6 for relief and inverted the pattern.


Using the last look, here is what my page looks like with the embossed pattern.


To go backwards, I undo, and then start again to add the texture. I enlarge it again, and like the look better for this particular layout. Just like this....


There you have it! A quick and easy way to use the patterns you love on a neutral background.
Thanks for stopping by and I hope you like this tutorial! I would love to see the pages in the gallery using this technique!
Jenn | jk703